Engine Un-seize, an update and news

Engine Un-seize, an update and news

One step forwards and a stumble backwards seems to be the name of the game with this restoration. You may recall that I had inverted the engine to gain access to the internals and the 'next step' was to disconnect the conrods from the crankshaft with the theory of being able to push one piston at a time out of the cylinder bores.

Well, that is where this update starts... Removing the nuts from the end of the piston conrods was nowhere as easy as I was expecting. Firstly the nuts have antique split pins, these pins have two 'legs' that are pushed through the nut and bolt and then bent in opposite directions which prevents the nuts from coming undone. This is a tried and tested design concept and is perfectly reasonable until you want to remove them because straightening those legs to push the pin out of the hole is usually a bit of a pain because once the pin is distorted it is usually reluctant to slide out the hole designed for a straight pin.

These pins definitely fitted into that category AND they were in a confined space so access was limited and very fiddly. There were also a couple of cases where the split pins were too long and could not be pushed out of the bolts because they hit the crankshaft. cutting the pins shorter was not possible because the access was too limited. These little rascals took the most time to tease out but eventually I got there.

I could now undo the nuts that had been secured by the split pins - or so I thought... the nuts seemed to be rather tighter than I would expect them to be. Make that VERY much tighter than I would expect. I could not move any of them with a normal socket wrench which you would normally expect to be able to do if they were tightened to the factory torque setting of 30ft-lb. So I pulled out the trusty torque wrench and kept winding up the torque setting until the nuts DID move. Shock-Horror - there wasn't a single nut that was under 100ft-lb and one of them was closer to 125ft-lb.  I certainly wont be reusing THOSE bolts!

Sadly - I was not able to remove all of the nuts which means that I still cant remove the crankshaft to persuade the pistons out. The rotation of the crankshaft means that the two pistons which are halfway through their rotational stroke are very close to the side of the engine block - which means there isn't room to get a socket onto the nuts - which means I cant fit the (wound up) torque wrench onto the sockets. This caused some minor irritation on my part along with a bit of muttering as it had taken rather a long time to get to this point...

So... back to trying to remove rust from the cylinder bores so that perhaps I could release one or two of the un-bolted pistons and maybe then partially turn the crankshaft to gain access to those tricky nuts.

I had read on the internet about a rust removal liquid that is not caustic, is reusable and is safe to flush into domestic drains so I thought I would give it a go. The internet had demonstrated submerging an entire chassis in this liquid so that rust was removed inside and outside of the chassis rails. Worth a try I thought.

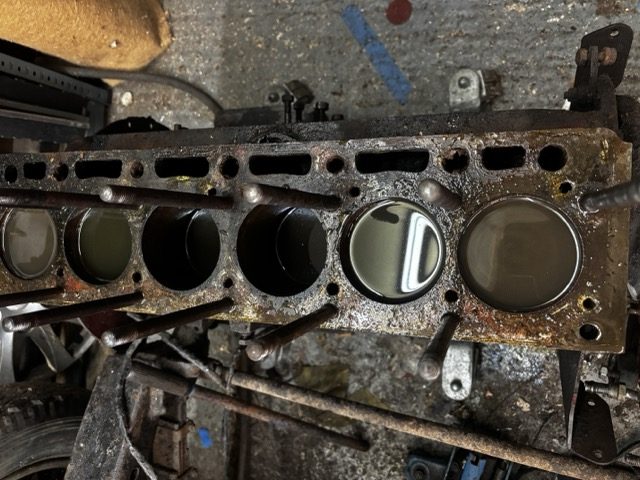
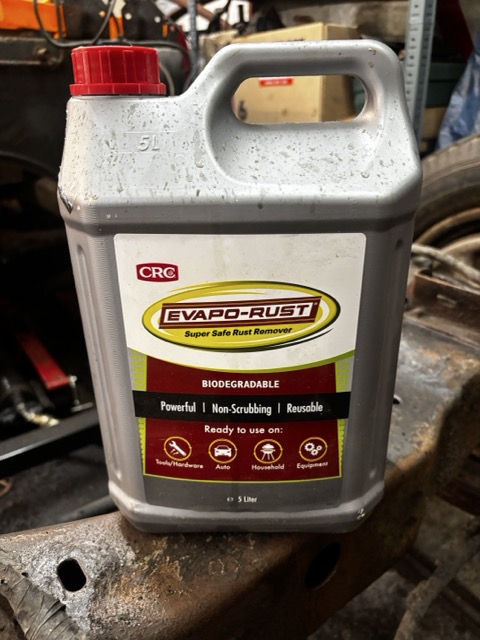
This liquid is called 'Evaporust' and having tried it on other rusty components - I was quite impressed and I can add my recommendation to using it. It leaves a pretty clean surface that needs to be washed and then treated with a rust preventative to stop it returning but it DOES do what it says on the tin. In the picture above you can see the cylinder bores filled with this liquid and I left it for a week to work its magic. After 7 days I removed the now-black liquid and poured it into a spare container for re-use. The cylinder bores looked substantially better now so I treated the top of each piston to a taste of my air-powered hammer. I wasn't expecting much to happen and I can advise that my expectations were met - it had made no difference at all.

I cant tell you how disappointed I was feeling at this moment - perhaps the engine CANT be un-seized and given the rarity of these engines, that would almost certainly mean that the car would be way beyond economical repair. It was a sad time.

Rather despondently, I decided to reach out to Davenport Jaguars - a company who specialised in the sale and restoration of pre-war and early post war Jaguars. I have bought some parts from them before so I knew they had a pretty substantial workshop (and buildings full of spare parts) and I was aware that they used a particular chap to do all of their engine work. Problem is Mr Davenport who owned and managed the company was aged and has sadly passed away. The company is now managed by his son but it's not his day job, so I reached out to the new owner asking to talk to their engine builder.

I have now spoken to said engine expert 'Geoff' and we had a very productive conversation about restoring my 3.5ltr engine and in restoring MK4's in general. To cut a long story short, he was less concerned about the seized engine than he was about cracks between the water ways and other areas of the engine, he mentioned if there were any cracks between the water ways and the push rod enclosures - the engine is scrap...

I have been trying to un-seize the engine for around 18 months so to hear that this was not the worst potential problem was rather hard to hear... 

Luckily the engine is mostly stripped apart so I carefully cleaned up and looked at the voiced problem areas. Cutting to the chase - I am not able to 'see' any cracks anywhere so I am hopeful that I have a good block. Geoff's experienced eye will be the final word though so we spoke about engine rebuild costs and the next steps.

Right now I am putting the engine back together (loosely) and will then book the engine in for evaluation and hopefully a full rebuild. Geoff did warn me that he is just one man and is very busy with other work, but having rebuilt 96 of these engines he is confident we as long as the block is not cracked, then we can get to a good reliable running engine... that was great news to my ears especially as I was in the zone of thinking the engine was NOT rebuildable.

Oh, you may be wondering how Geoff plans to unseize the engine...

He said 'there are a number of things he will try but worst case he will simply put the block into a jig and grind the top of the pistons off the conrods, basically grinding away the part of the pistons that are stuck to the cylinder bores'. That is a tool that not many people have access to and will of course destroy the pistons but they would be replaced anyway... more on this at a later date once Geoff has the engine in his hands...

This is the stuff I now use to de-rust metal parts:
Engine StripDown

Engine StripDown

This was never going to be easy... you will remember my best attempts to soak the pistons to free them from being rusted into the cylinder bores, resulting in negligible progress so the thought is now to remove the crankshaft which all of the pistons are connected to which will mean each piston can be dealt with separately.

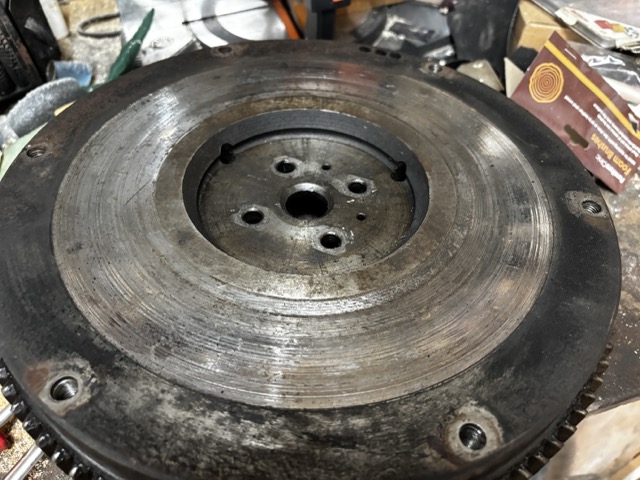
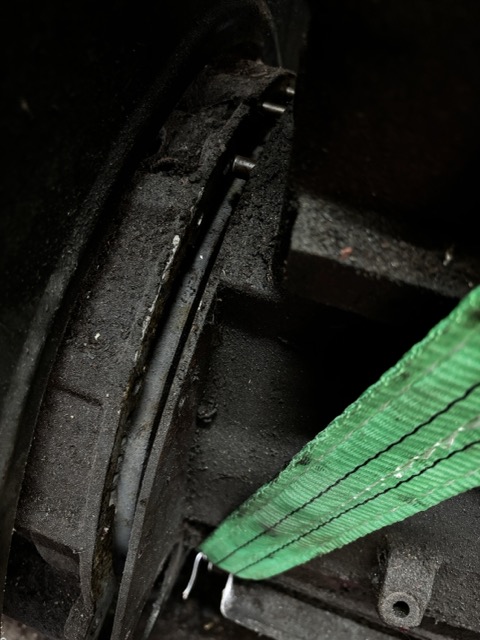
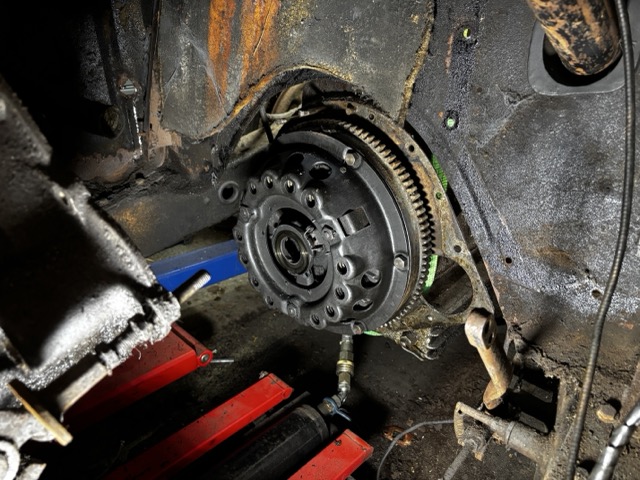
The clutch removal was simple enough and the flywheel is in half decent condition although it looks pretty shabby in the photograph - but what did surprise me is that the gearbox was mated to the engine block using an adapter-spacer plate and was not bolted directly to the engine like 'normal'. In theory this means that if I remade the adapter plate I could in theory fit any gearbox I like... something to possibly consider in the future if the gearbox turns out to be beyond repair.

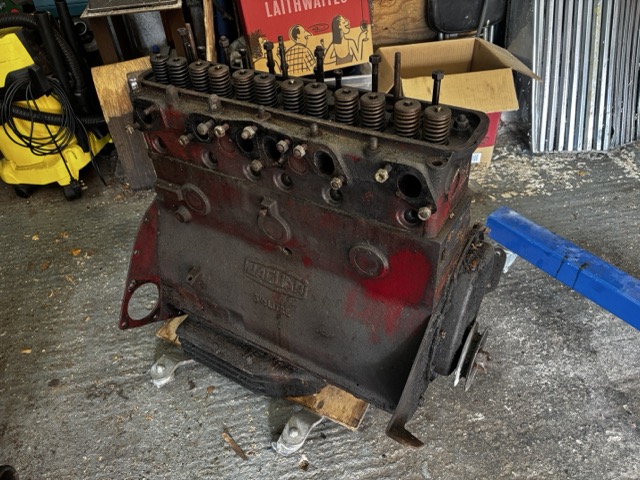
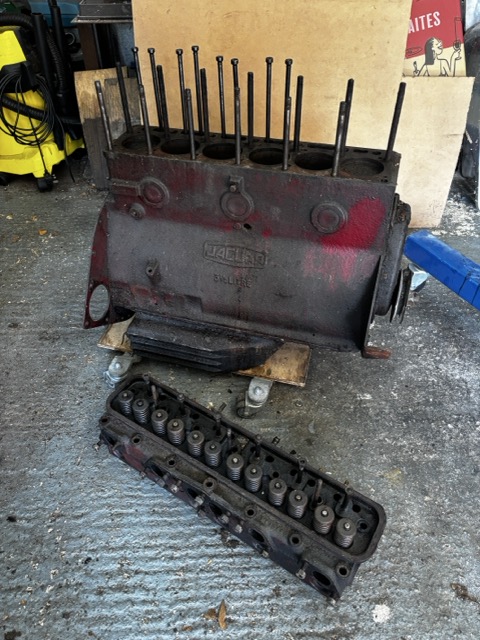
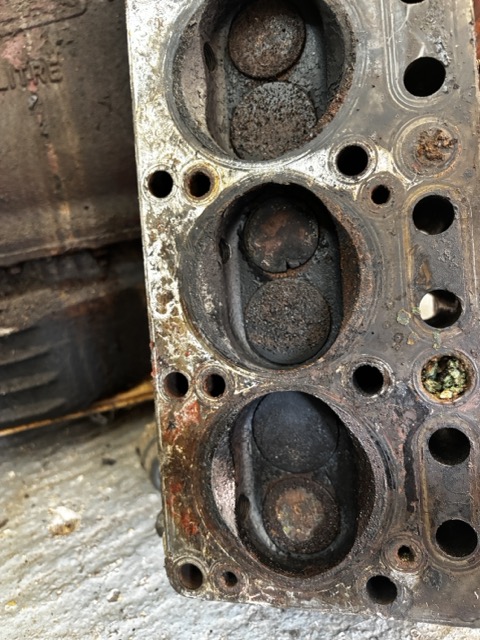
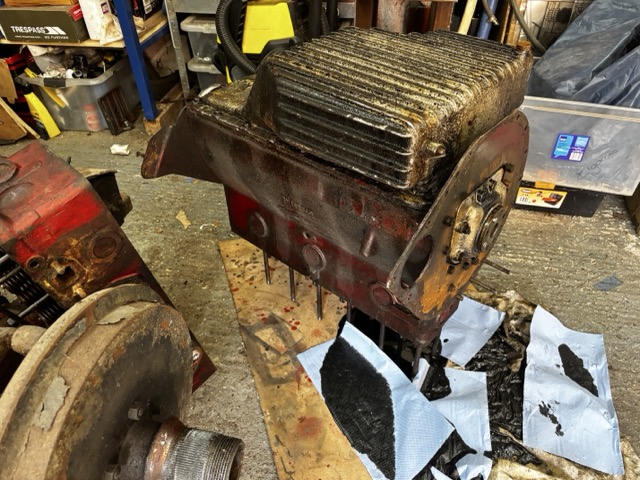
Back to the engine strip down - first step was to remove the cylinder head. That was easy enough as I had removed it a few weeks back, but it did nudge my memory of the burnt valve in cylinder 5 (all of the valves will be replaced anyway). Next I need to turn the engine upside down and I had drained the oil from the sump pan previously so all I needed to do was manhandle it so that it say on the engine studs so that the sump could be removed. What I had not accounted for was that it turns out there are numerous places in an engine where oil pools and wasn't able to be drained - so you can guess what happened when the engine was inverted... yep a big pool of oil quickly formed on the garage floor. 

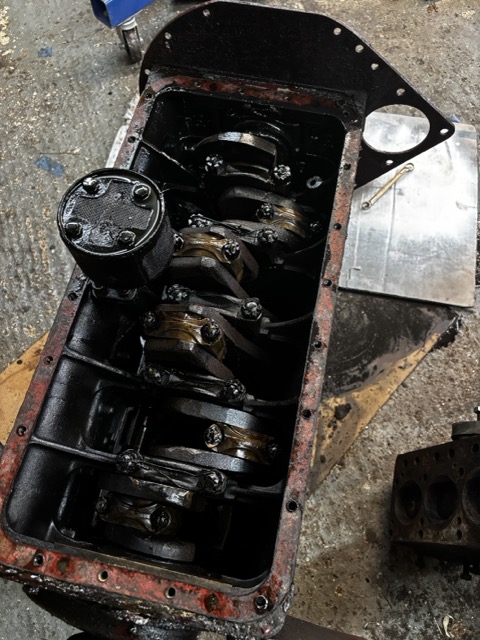
The mess aside I could now remove the sump to gain sight of the crankshaft and pistons etc. Removal was easy but I made note that there more than a few bolts missing that will need to be replaced during the engine build.

What you cant see easily in the picture above is that the main bearings are locked in place with steel wire that does not look professionally fitted - so I am wondering if the engine has been apart before? Work has now started on removing the split pins, nuts and bolts from the conrods connected to the pistons. This is time consuming and rather frustrating due to the confined spaces but fingers crossed, there will not be much trauma in the exercise, just a bunch of frustrating days ahead...

Engine & Gearbox Removal Part 2

Engine & Gearbox Removal Part 2

Now that my Vintage Riley is being enjoyed and used for its intended purpose by its new owners (Vintage Sports Car Racing), my attention can shift back to the MK4. The primary focus continuing to be the release of the seized engine. Although the blog has been quiet recently, some effort has been spent on moving this forwards, primarily - trying to work out how to remove the gearbox through the interior of the car like the manual advises. I had found a couple of bulkhead panels that seemingly were not removable but were in reality possible but fiddly to remove, the fixings were merely hidden requiring a level of experience that I simply do not have. Moving on...

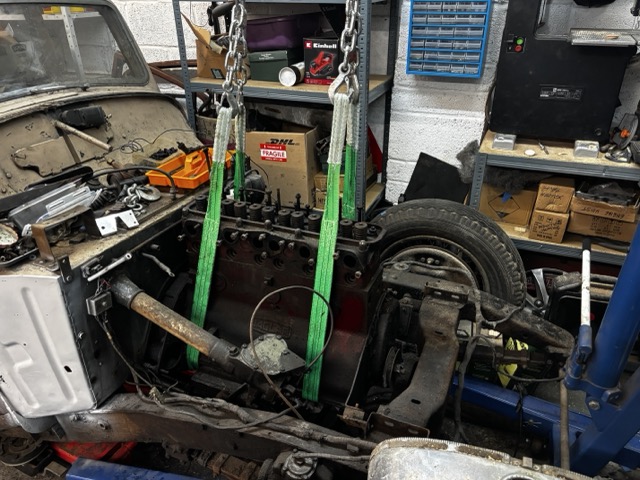
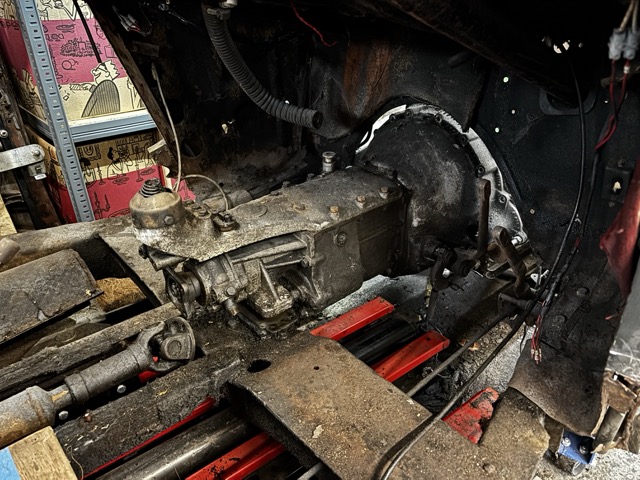
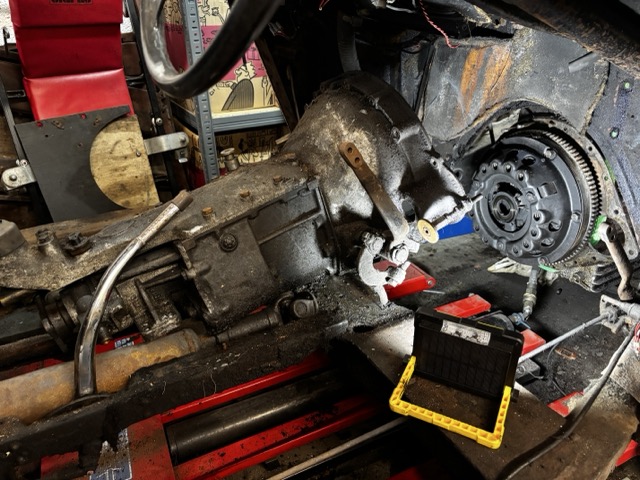
The next challenge was working out what else needed to be removed in order to move the gearbox backwards. I had unbolted it from the rubber mount and disconnected wiring, speedo drive, prop shaft, gear lever etc and using the engine crane the gearbox and engine would lift off the chassis as-a-unit so conceptually all that was now needed was to remove all the connecting bolts between the engine and gearbox - which I did. With all the bolts removed (checked and double checked), sadly the gearbox refused to part from the engine so the last few weeks were consumed worrying that perhaps the main gearbox shaft had rusted into the clutch plate and that was potentially bad news. I did in fact get to the point of seriously considering removing the gearbox and engine at the same time but it was then that I notice that the top area of the gearbox had (very) slightly separated from the engine block so if I was careful with some wedges perhaps I could coax the two components apart... and this turned out to be the case.. they did indeed slowly ease apart.

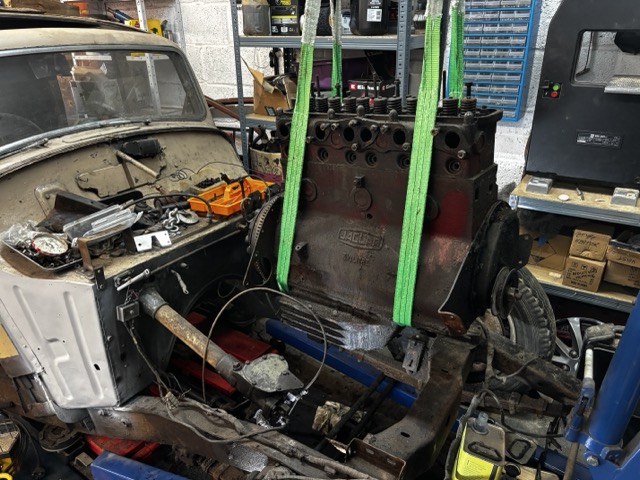
With new found enthusiasm - I ensured the gearbox and engine were parallel with each other and continued to tickle  them apart with a mix of large screwdrivers. This was going well.. until it stopped moving, oh poop I thought, what's up now? Looking inside the car, I could see the back of the gearbox was hitting a chassis crossmember so 'somehow' the gearbox needed lifting up in order to clear that. The gearbox looked pretty heavy but given the weight of the engine had mostly been countered by the Engine Crane, I found it was possible to crouch inside the car (with my feet on the garage floor because I had removed the floor boards) - I could lift the back of the gearbox enough to then wriggle it backwards until finally (Ta-dah) it separated and sat on the crossmember. With the gearbox clear, it was now simple enough to lift the engine up and out of the engine bay (fanfare number 2).

The clutch itself appears to be in reasonable condition, but obviously it has not been used in many many years so I will replace it as a matter of course, the flywheel is lightly scored but that will be refaced too.

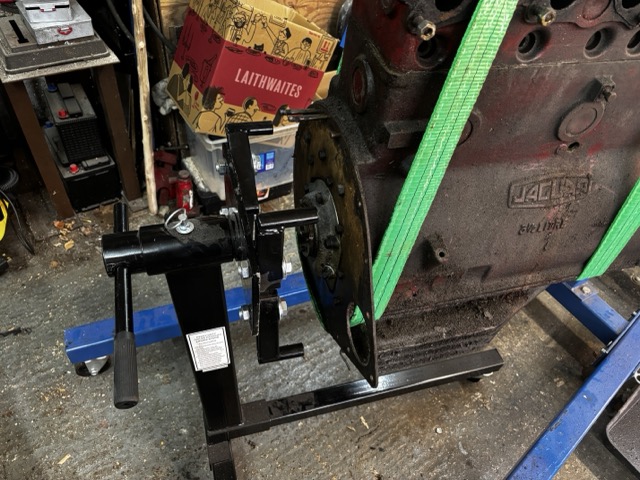
Next steps are to get the engine onto the 'engine stand' so it can be rotated and worked on... i.e. I can remove the crankshaft etc in order to give the pistons a little persuasion. Onwards and upwards...

Engine-Gearbox removal

Engine-Gearbox removal

My focus for the last few months was prepping  my Vintage competition Riley to be sold which basically closes the 'Riley Blog'. I am pleased to say that the Riley has now indeed sold  and it went surprisingly quickly. Whether that was because my pre-sale prep was good or whether I was in the right place at the time, I will never know but essentially I mentioned in the Riley Special Facebook forum that I was putting my car up for sale and 10 minutes later I had someone who was interested. Cutting to the chase: I now have some funds to spend on the Jaguar restoration!

So - onwards...

In theory I can remove the gearbox from the car without removing the engine (and vice versa). I am tempted to do exactly that - remove the gearbox first. This is primarily so that I can learn HOW to do that and then remove the engine afterwards. So I started undoing the bolts connecting the gearbox to the engine. It's a little bit fiddly doing this on my own because most of them spin if you only have a spanner on one end., so I have to find a way of holding the nut without actually touching it when I turn the other end. I pair of Mole-Grips seems to be the answer but whilst I was undoing the bolts on the drivers side - I tweaked my back so I stopped working in the confined place and turned my attention to other restoration work. This post lightly touches on that 'other' restoration work.

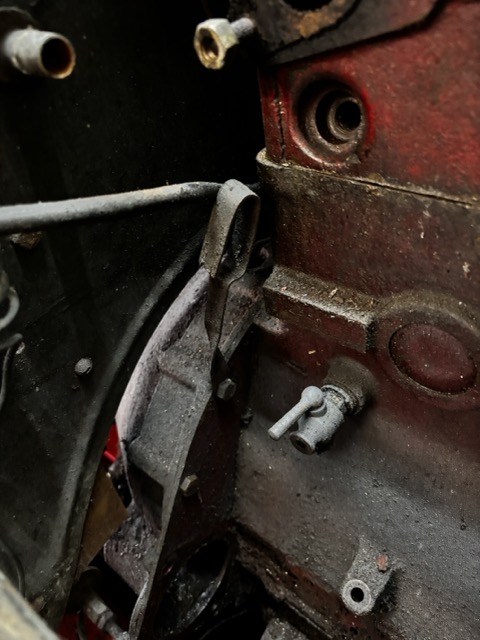
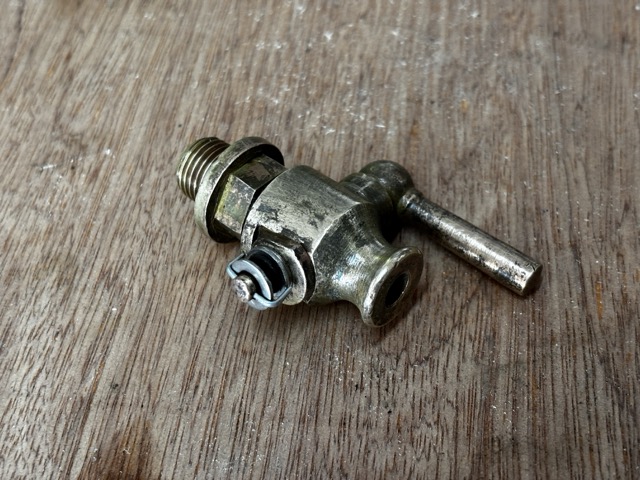
First up: The engine block has a brass water drainage tap. It's rather strangely located above the starter motor so water being evacuated will pour onto the starter motor. Why would anyone do that? Regardless, I could tell that the tap was seized and I knew it would be relatively easy to strip apart and rebuild. The tap was filled with condensed muck which needed removing before trying to wriggle some life back into the brass components. Luckily brass does not rust so but the surfaces do tarnish. After a while I managed to coax the handle to turn having been very careful not to snap the handle off by being overly enthusiastic. Below is the before and after pictures. I may polish the brass at a later date


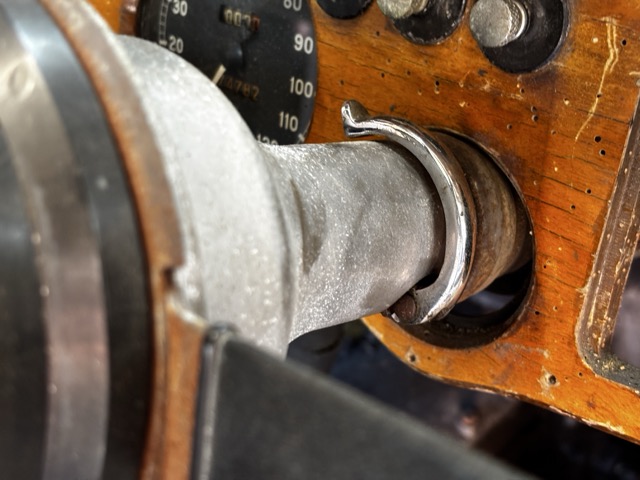
Next, Steve had mentioned that he had never managed to stop the steering wheel, extending if you accidentally pulled on it. That is not something I fancied as being a feature of driving the car and I could see there was a clamp on the steering column that 'should' lock it into the chosen position. He was right - the steering wheel did indeed pull towards the driver rather more easily that it should. Taking the clamp apart - naturally part of it was seized but ithe lever also looked awkward somehow so I rotated it 180 degrees so that when it was in the locked (i.e. tight) position the clamp hugged the steering column rather than pulling towards the locking nut. This is a little hard to describe but strangely in this rotated position the clamp worked just as it should... well that was easy. 

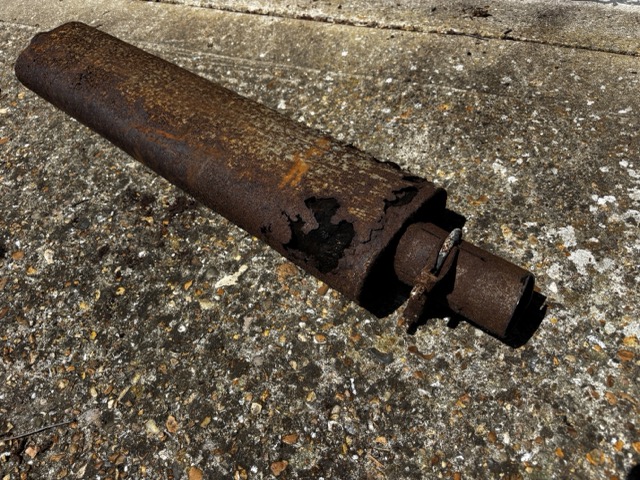
Next - with the ache in my back diminishing - I cut off the remains of the exhaust system which I shall give to the scrap metal chaps = I am sure they will be jolly excited about it. The exhaust is unusable so cutting it up was the quickest way of removal. 

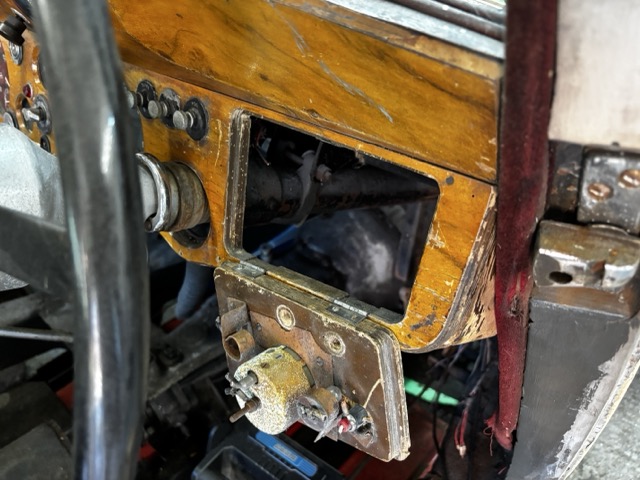
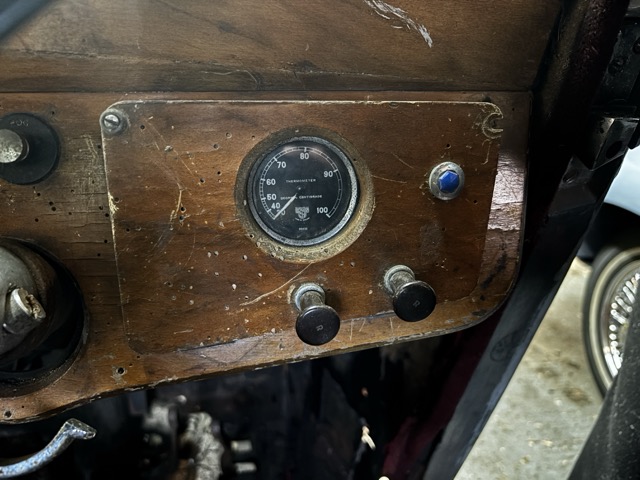
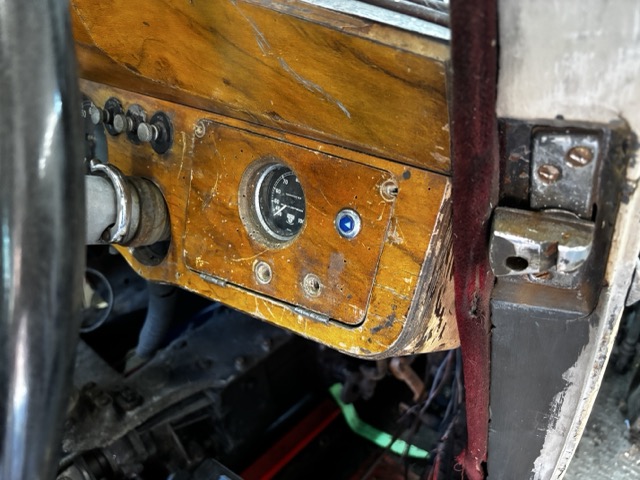
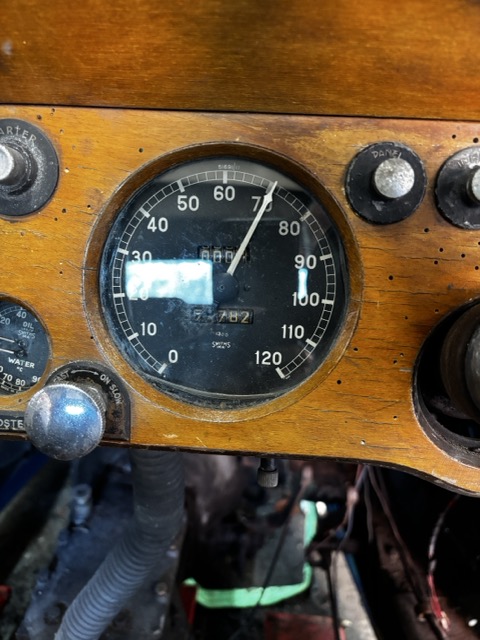
To remove the gearbox - obviously you also need to remove everything connected to it. Essentially this is a couple of wires for the reversing light, the speedometer cable which tells me the speedometer is mechanical (not electrical) and unusually there was a temperature gauge for the gearbox. Steve had mentioned that he rallied the car back in the day so I imagine the gauge was to keep an eye on the oil temperature. But being non-standard, Steve needed to find a location for the gauge and he decided to fit it into the drivers side glove box lid. I do not want or need that gauge so I will be replacing the glove box lid when I restore (read that as 'remake') the wooden dashboard which is or was full of woodworm. So I simply re-fitted the hinges on the glove box lid in order for it to shut.


Having removed the speedometer cable - I noticed that the end which fits into the gearbox was no longer connected to the cable, which implies the speedometer stopped working at some point in its life. But with a little bit of artful bodgery - hmm memo to self: 'Artful Bodger" would be a great name for a slightly underhand restoration company... sorry I got distracted - I found if I wrapped the end of the cable and re-inserted it into the cable-end - then I had a working connection. Granted the bodge is very-very temporary but I can at least use it to see if the speedometer worked. Putting an electric drill on the end of the cable would be enough to mimic the cable rotation from the gearbox so that is what I did. Did it work? In short no. It then occurred to me that perhaps the cable ws designed to operate in the opposite direction which is simple to do on a drill - and.... the speedometer needle twitched. switching back and forth on the direction of the drill saw the sticky speedometer come to life. Nice that saves me some money but I will restore the gauge properly later. One day I hope to see this speed for real....


Gearbox removal Part 1 – interesting discoveries

Gearbox removal Part 1 – interesting discoveries

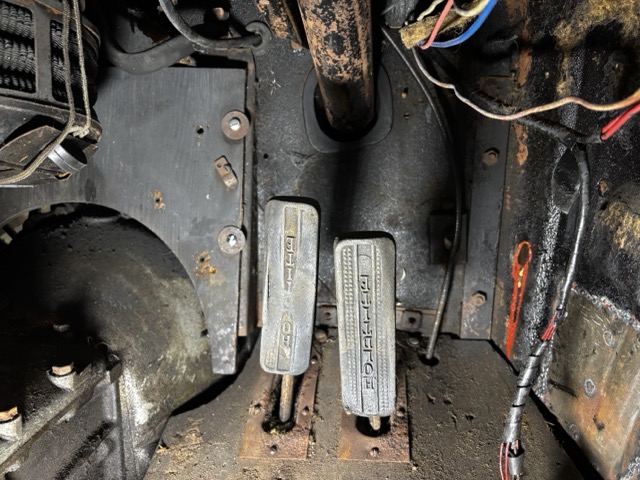
New-ish territory for me. I have removed and replaced gearbox's before but not in a Mk4 Jaguar. So I am expecting to uncover a few nuances. One of these is that the gearbox is removed through the inside of the car and out through one of the front doors. Obviously this means stripping out the interior (already done) but also removing the toe boards (the panels your feet rest on when sat in the car). These toe boards are simply flat sheets of plywood held in place with a few screws albeit the screws are rather rusty. Once removed you gain access to where the gearbox and engine are bolted together which makes life a little simpler. The clutch pedal and brake pedal are worryingly close together and I cant (yet) work out which one is incorrect - or why...

A nice feature are the rubber covers on both pedals - having a brake pedal labelled "holdtite" is either an ironic name or a simple instruction because the brakes are poor. I have a funny feeling it may be both.

Yes the pedal rubbers are upside down - but that was probably due to uneven wear. I have reached out to learned friends in the Jaguar forums to see if these rubber pads are original fitment by Jaguar or simply a period fitting - but I am also wondering whether I can 3D print some new ones using the new TPU filament which apparently has great rubber-like qualities. Something for a rainy day..

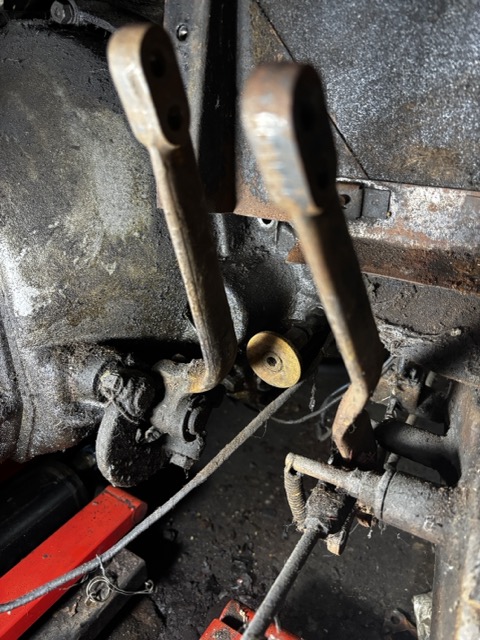
Having removed the wooden toe boards I now have access to what the pedals bolt to (see image below). The clutch pedal seems to bolt directly onto the gearbox which answers a question I had in my head as to whether or not the clutch  was hydraulically operated or not - the answer is clearly 'not'. I sense driving these cars was a bit of a physical workout. I will need to take a bunch of details photos of how that is fitted before I remove anything.

The brake pedal does appear to lean to the left a little and that may be due to wear in the shaft it is bolted to - we shall see. What I DONT recognise is that round disk at the bottom of the clutch pedal. The disk has a thick rod behind it which is solidly bolted to the engine block. Maybe this is a safety stop for the clutch pedal perhaps? I have asked the forum. I am sure a clever chap is out there somewhere.

Another surprise was seeing a temperature gauge fitted to the gearbox. I have never seen that before and I know it was not an original accessory because of where the gauge is fitted (into the drivers glovebox lid-top photo). I do know the car was rallied in its early life so perhaps this was a rally thing? I wont be keeping it because I have something else I want to fit inside that glovebox but it's too early to mention that yet.


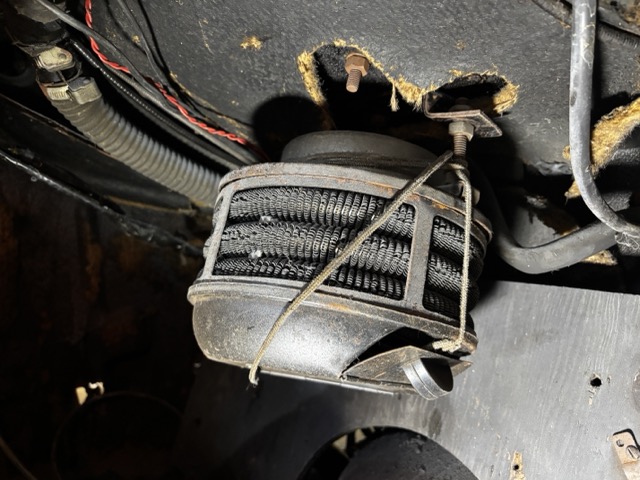
Whilst I was under the dashboard so to speak - I saw that the heater or 'air-conditioning' as they called it in the 1940's is held together with some string which I rather suspect is not correct. I wonder why that was done and what now needs fixing. It is a rather strange looking thing but I was lucky enough to find the interior trim that fits around it - so its nice to know that one day - we will at least have warm feet.