Bootlid ToolBox

Bootlid ToolBox

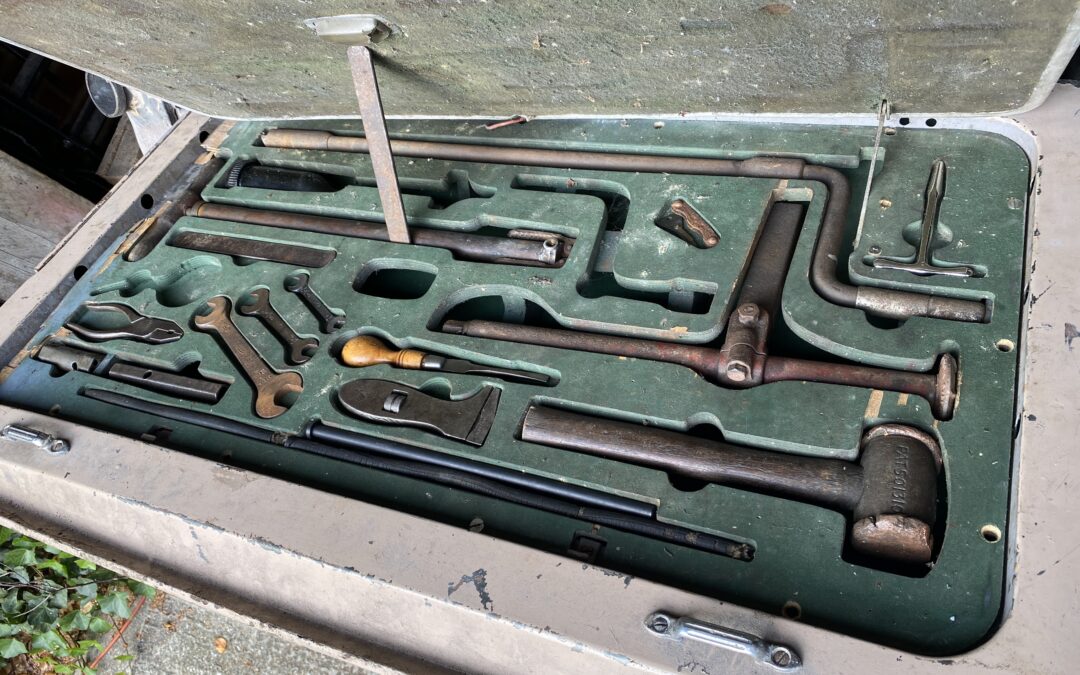
The tool tray / kit comprises a selection of 27 individual tools, including wheel changing equipment and items for servicing the car. These tools are located within profiled recesses laid out in a purpose built tool tray covered in a green baize like material. The tool tray is itself secured within the luggage compartment door (boot lid) and has a securable lid that can be clamped closed to hold all the tools in place.

The tools themselves changed slightly through 1945 to 1949 so finding the right tool for 1946 is likely to be a very long challenge, in the interim, I have found most of the tools with the correct part number but not necessarily the 1946 variant. I can live with that - it gives me some focus in spares days and auto jumbles.

I found a very helpful chap who wrote a slim manual on “original tool kits for MK4 Jaguars". So I know exactly what I am looking for. Luckily the car (as bought) came with the near impossible to find, starting handle and wheel Jack. There are plenty of Jaguar XK tools on the market which are close but not right.

The 27 tools are:

C.991 Grease Gun
C.1054 Nozzle for Grease Gun (missing)
C.992 Copper & Hide Mallet for removing the wheel spinners
C.993 Extractor for the inner tube valve
1406 Starting Handle
1390 Jack, Lifting
1394 Handle,  Operating Jack (missing)
C.204 Jack, Lifting
C.994 Spanner Adjustable
C.998 Spanner open ended 1/4 x 3/16
C.998 Spanner open ended 5/16 x 3/8
C.999 Spanner open ended 7/16 x 1/2
C.31 Spanner Box 3/16 x 1/4
C.32 Spanner Box 5/16 x 3/8
C.178 Spanner Box, for shock absorber Bolt
C.179 Spanner Box, for spark plugs
C.305 Spanner Box, for real axle bolts
C.30 Tommy Bar (Long)
C..34 Tommy Bar (short) (missing)
C.28 Screwdriver
C.995 Oil Can (missing)
C.996 Pliers
C.997 Pump Tyre
C.1001 Tyre-Levers
C.1002 Screwdriver for Distributer
C.1003 Feeler Gauge for plugs and Tappets (missing)
Key - Tee for spare tyre locks
Cracked Engine Valve Cover

Cracked Engine Valve Cover

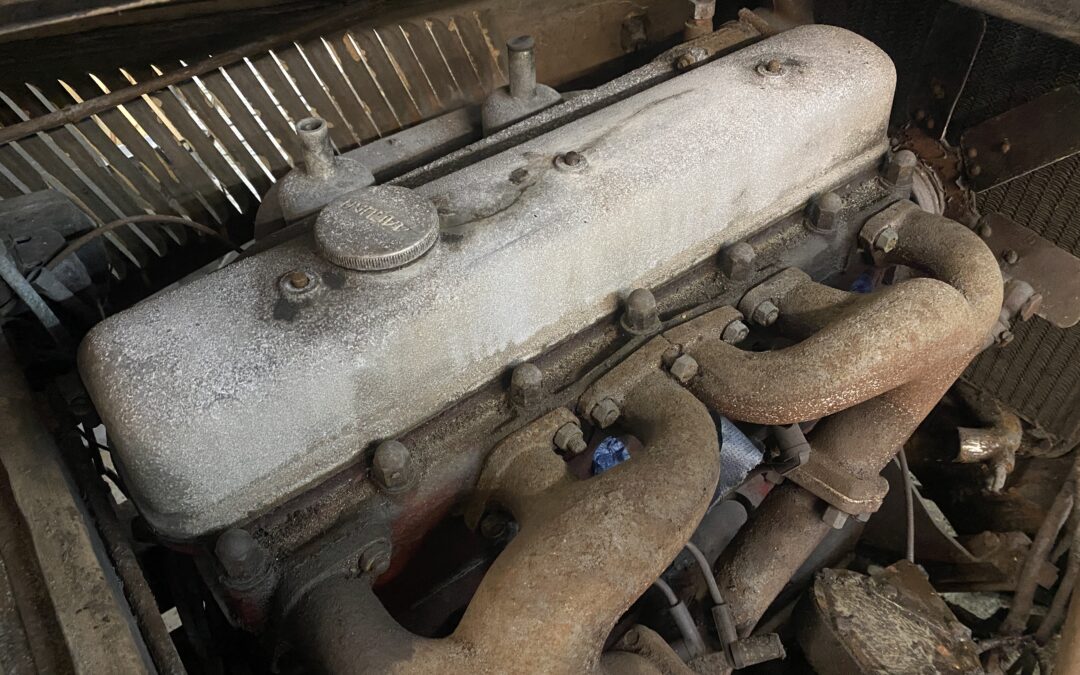
The MK4 engine is basically the same as fitted to the SS100 - it is an overhead valve engine as opposed to the later XK overhead cam.

Sadly, I have noticed that the alloy rocker cover has a hair-line crack between the clamp bolts which is disappointing, after a number of discussions with some specialists, I have found someone who can laser weld and say they can repair the damage.

During that discussion, I mentioned to an SS specialist that the steering has an awful lot of play even for a vintage car, and having sat in a restored MK4, I now know the steering box needs some serious attention. Luckily that specialist said this was a common problem and he manufactures the parts to rebuild it.

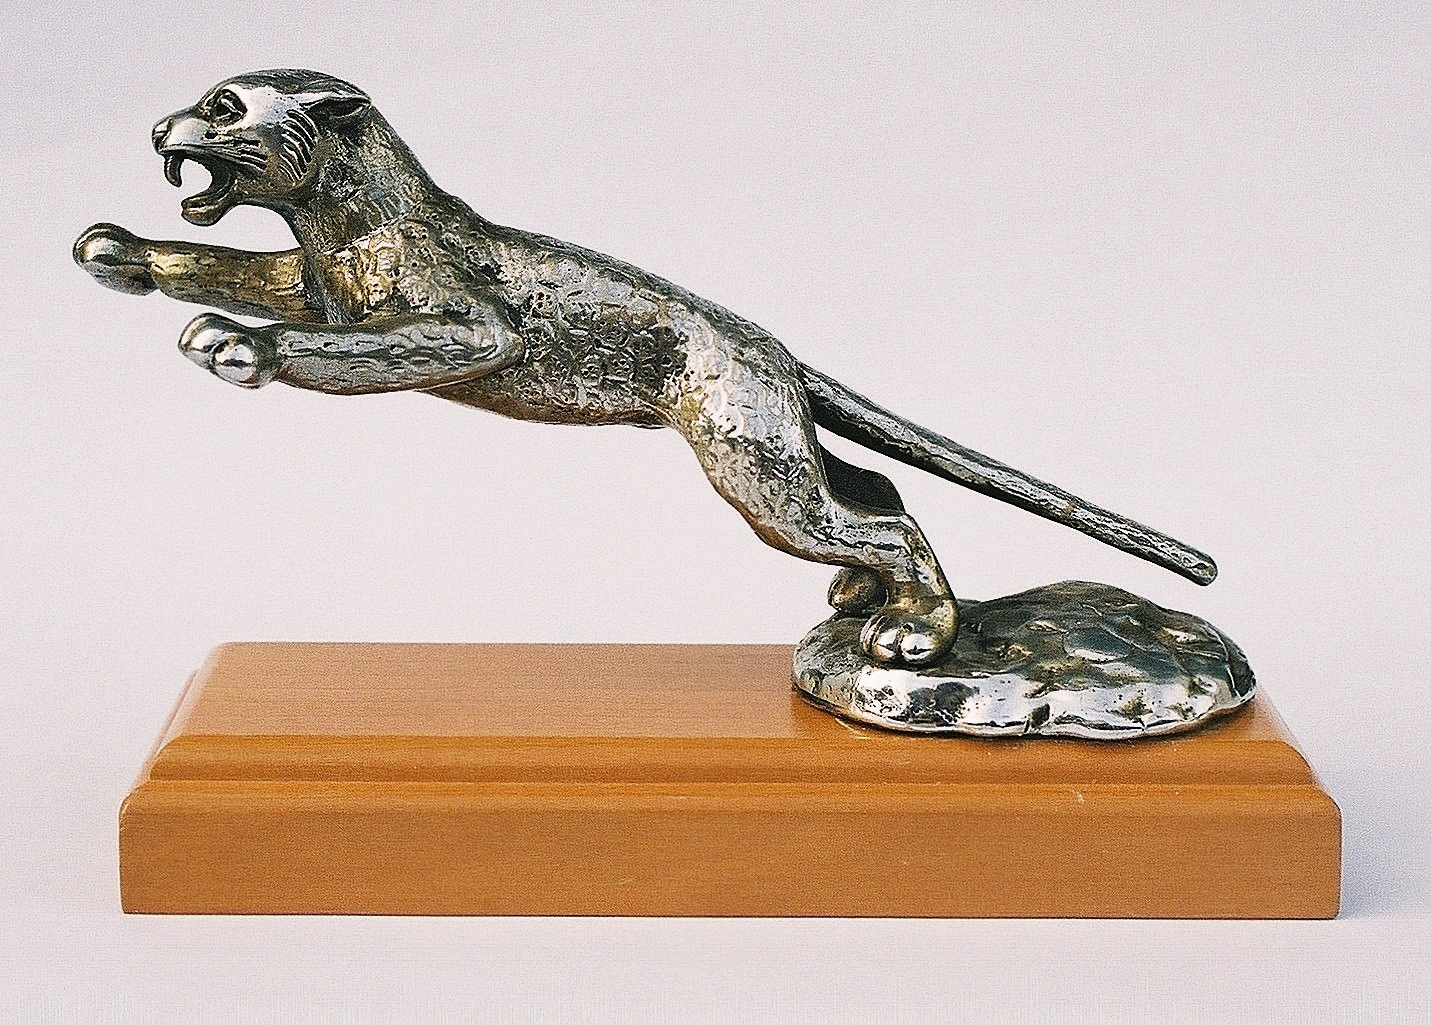
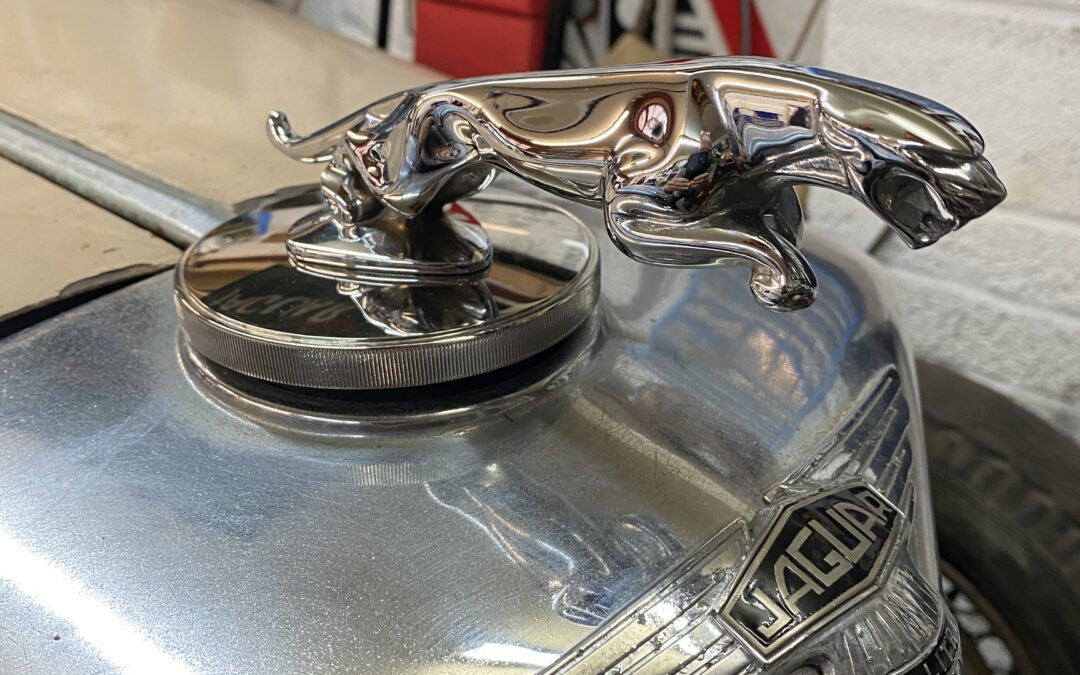
Original Radiator Mascot

Original Radiator Mascot

Not too much to say on this post, the picture says it all...

The Leaping Jaguar by Frederick Gordon Crosby is one of the most instantly recognisable motoring symbols in the world. Yet, when SS Cars launched the Jaguar model in 1935, the brochures and other sales literature for the 1935-36 model year did not feature the now famous leaping cat.

Instead, the catalyst for SS Cars adopting a mascot may have been the sight of a Desmo version mounted on the radiator cap of a car in the Foleshill Works, probably some time in late 1937 or early 1938. The stories vary, but either Bill Rankin, SS Cars marketing chief, or William Lyons himself saw the mascot and described it as a “cat shot off a fence”. Rankin was then told to arrange a Jaguar mascot of the marque’s own.

Below is the first version.

Post the war, SS Cars became Jaguar and the first model, which later became known as the MK4 was introduced with the leaping Jaguar mascot fitted to the radiator cap.

It was a factory option so not all MK4's had the mascot and the radiator was simply a plain flat screw in cap. My car was not released from the factory with the mascot so the search was on for an original that I could retrofit. EBay is full of later model versions but they are not the same. I did locate a company that reproduces a replica which I did consider but was lucky enough to find a restored original mascot that had been converted to a piece of 'desk art', coming with a custom built mahogany and brass base plate. The cost was noticeably less than a replica so I bought it complete and then stripped off all the parts that I didnt need.

All it took then was to find a spare radiator cap with the mounting hole and that was it job done as you can see in the picture. I wanted the spare cap so that I had the option to swap the mascot for the plain radiator cap where there was a risk of someone stealing the mascot!

Blog catchup to start the year off

Blog catchup to start the year off

 There have been lots of tiny progress steps taken over the last few months, none of them are in the critical path of restoration but I had to finish off trimming my vintage Riley competition car so that it can be put up for sale during 2024.

I need to bring this blog up to date:

* Obtained: Replacement front seat frames

* Obtained: Original Leaping Jaguar radiator mascot

* Obtained: a number of tools for the bootlid tool kit

* Obtained: replacement hinges for the bootlid tool compartment

Manufactured: Replacement rear number plate with letters that are illuminated from behind

So lets make a start on updating the blog:

FRONT SEAT FRAMES

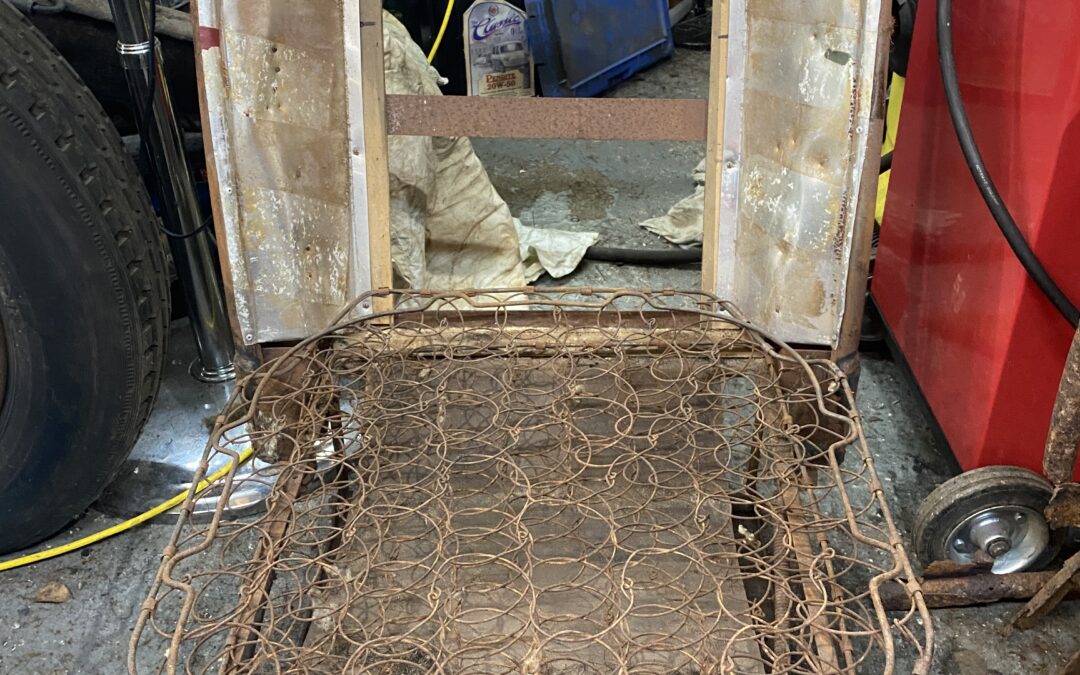
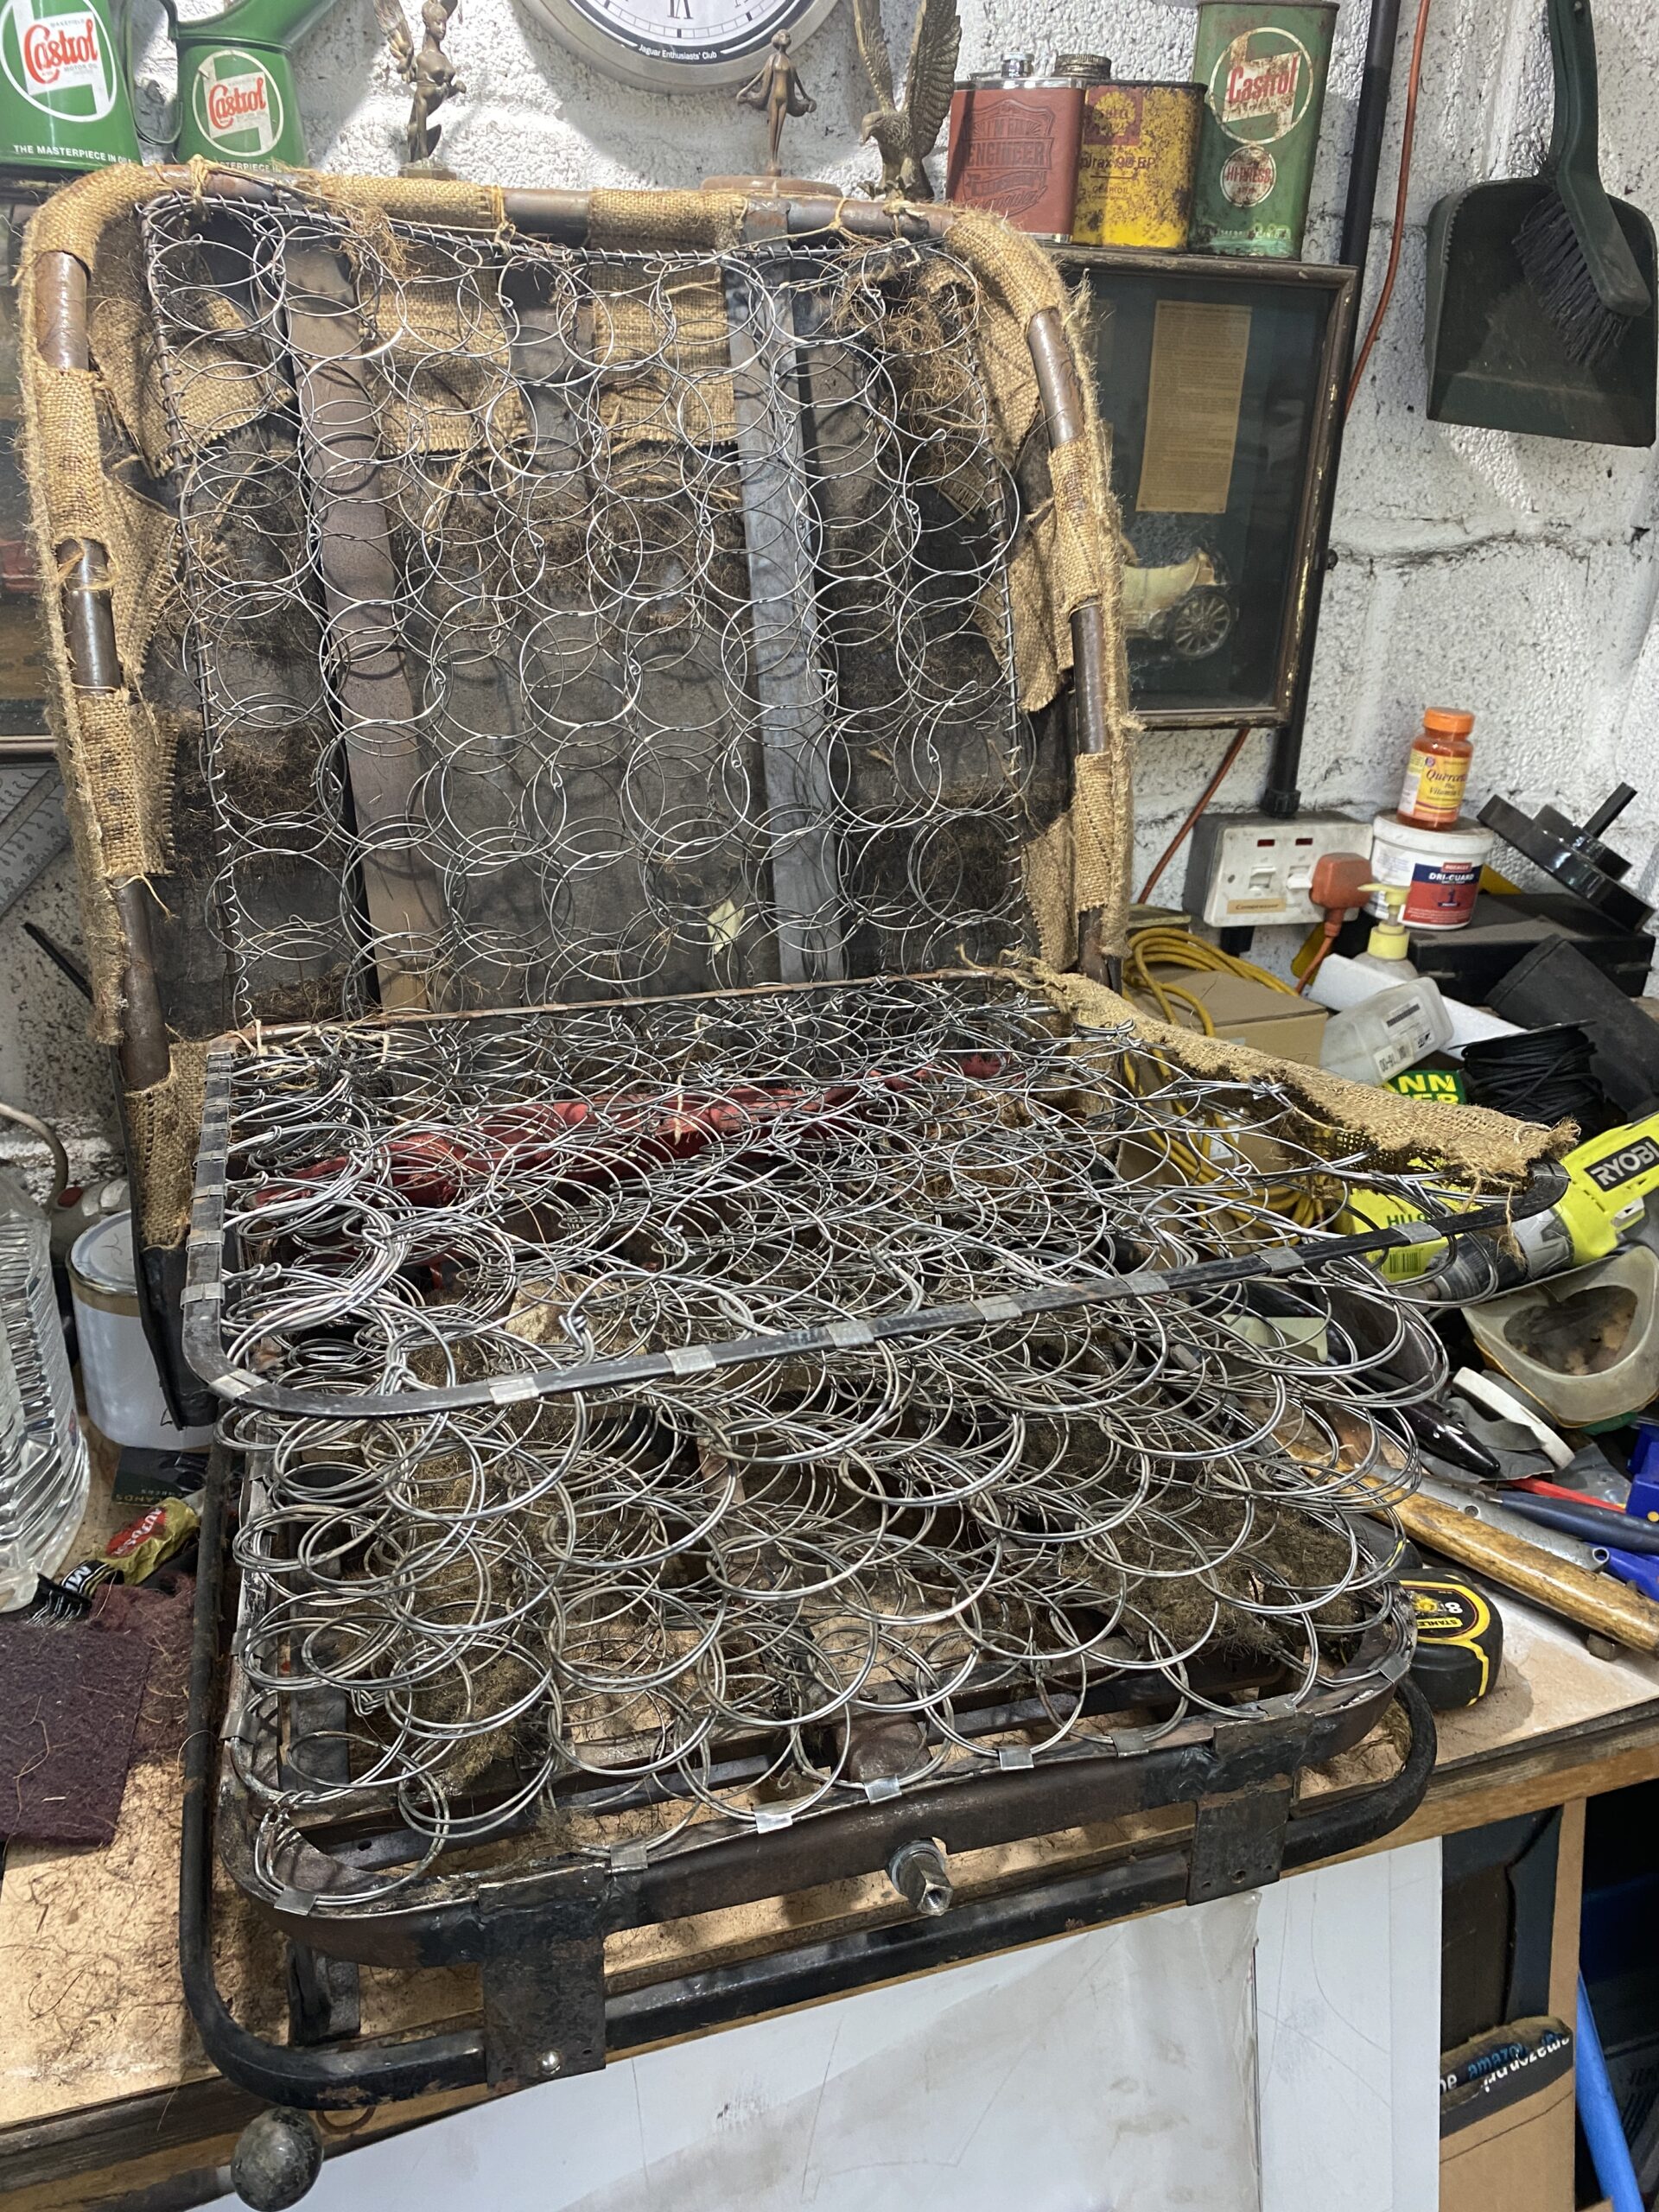
I have one complete front seat, the other one is terminally corroded so I have been slowly remaking the seat frame from scratch learning new skills along the way but accepting that I will probably never need to use some of them again. That work went on hold whilst I investigated how to bend a one-piece seat back hoop from 20mm pipe into a complex set of curves that need to match on either side. I have heat, I have pipe bending tools, but this part of the fabrication was alluding me. Luckily, I met a very kind MK5 owner who had a barn full of spares (for a MK5) and he had a few spare seat frames that he was happy to let me have for a token payment. The MK5 seats were actually fitted in 1948, the last year of the MK4 manufacture. The style of leather trimming was slightly different but underneath the leather the frame is the same shape as the MK4 albeit 25mm wider.

So, I now have 2 matching front seat frames which I can trim to look MK4 correct. I forgot to mention that I do need to re-create the spring-filled seat cushions. Luckily the original MK4 seat can be used as a model, and I know a man that sells the springs. Seat spring cushion manufacturing skills are on order 🙂

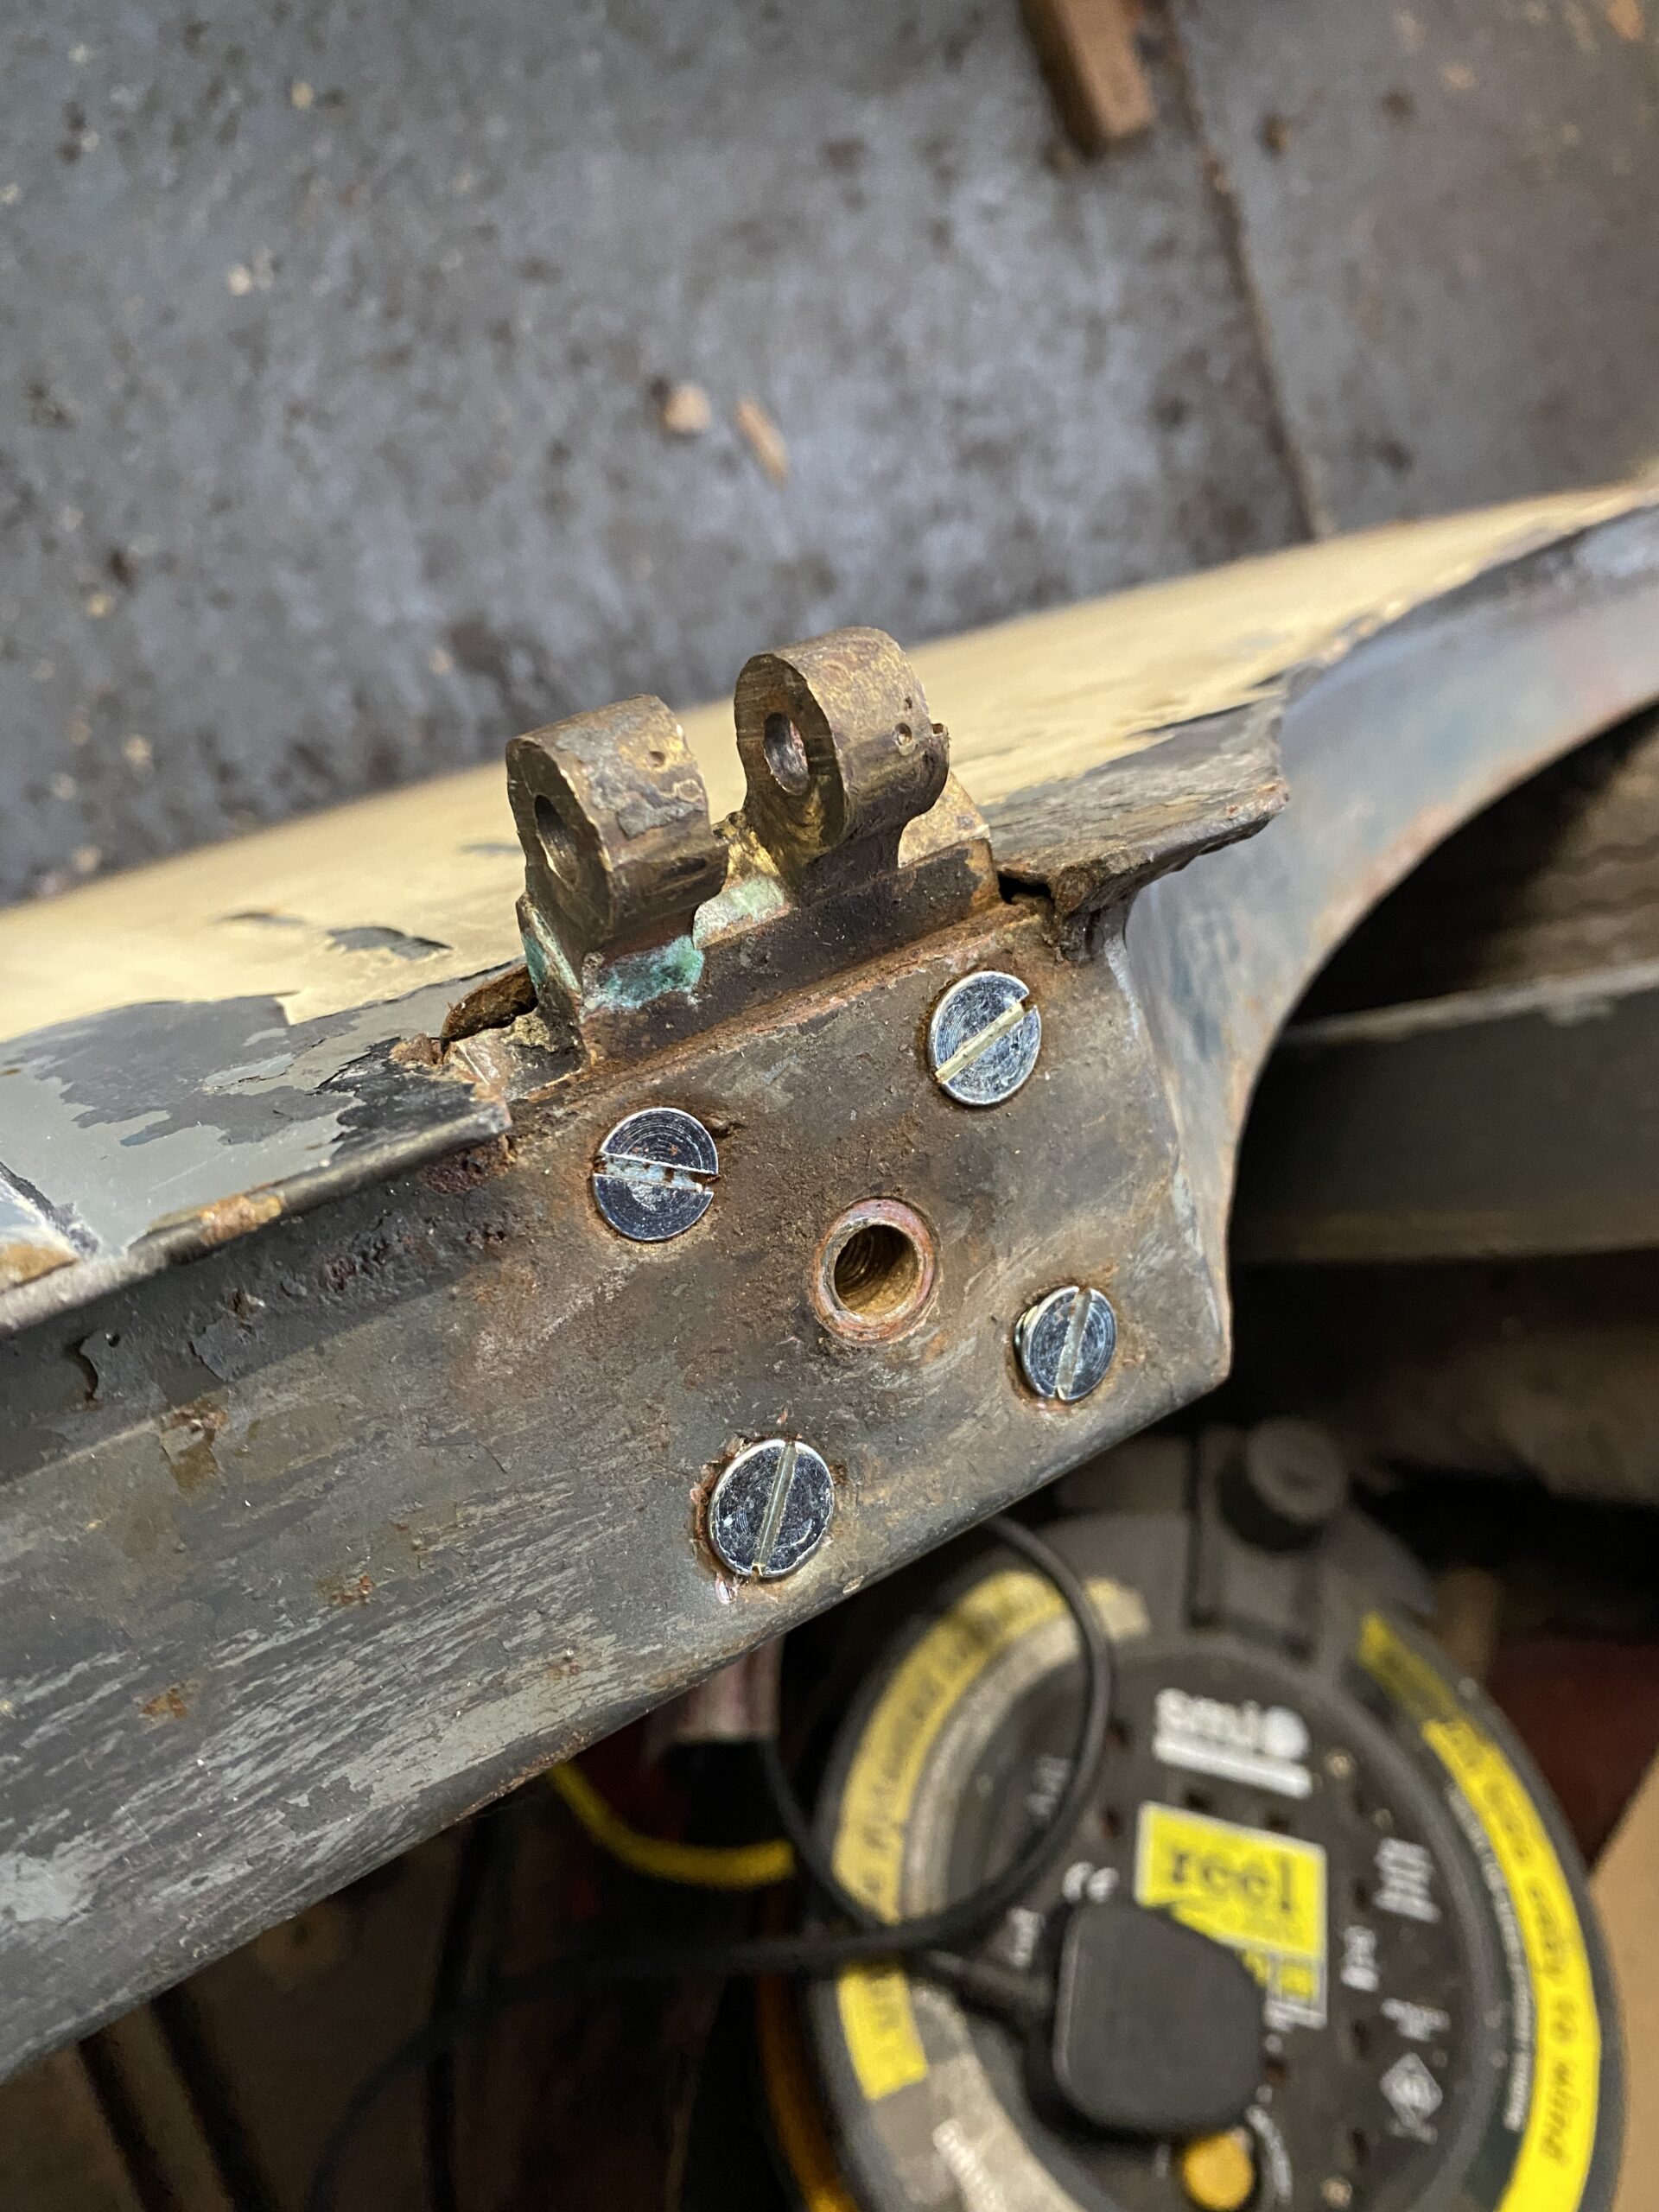
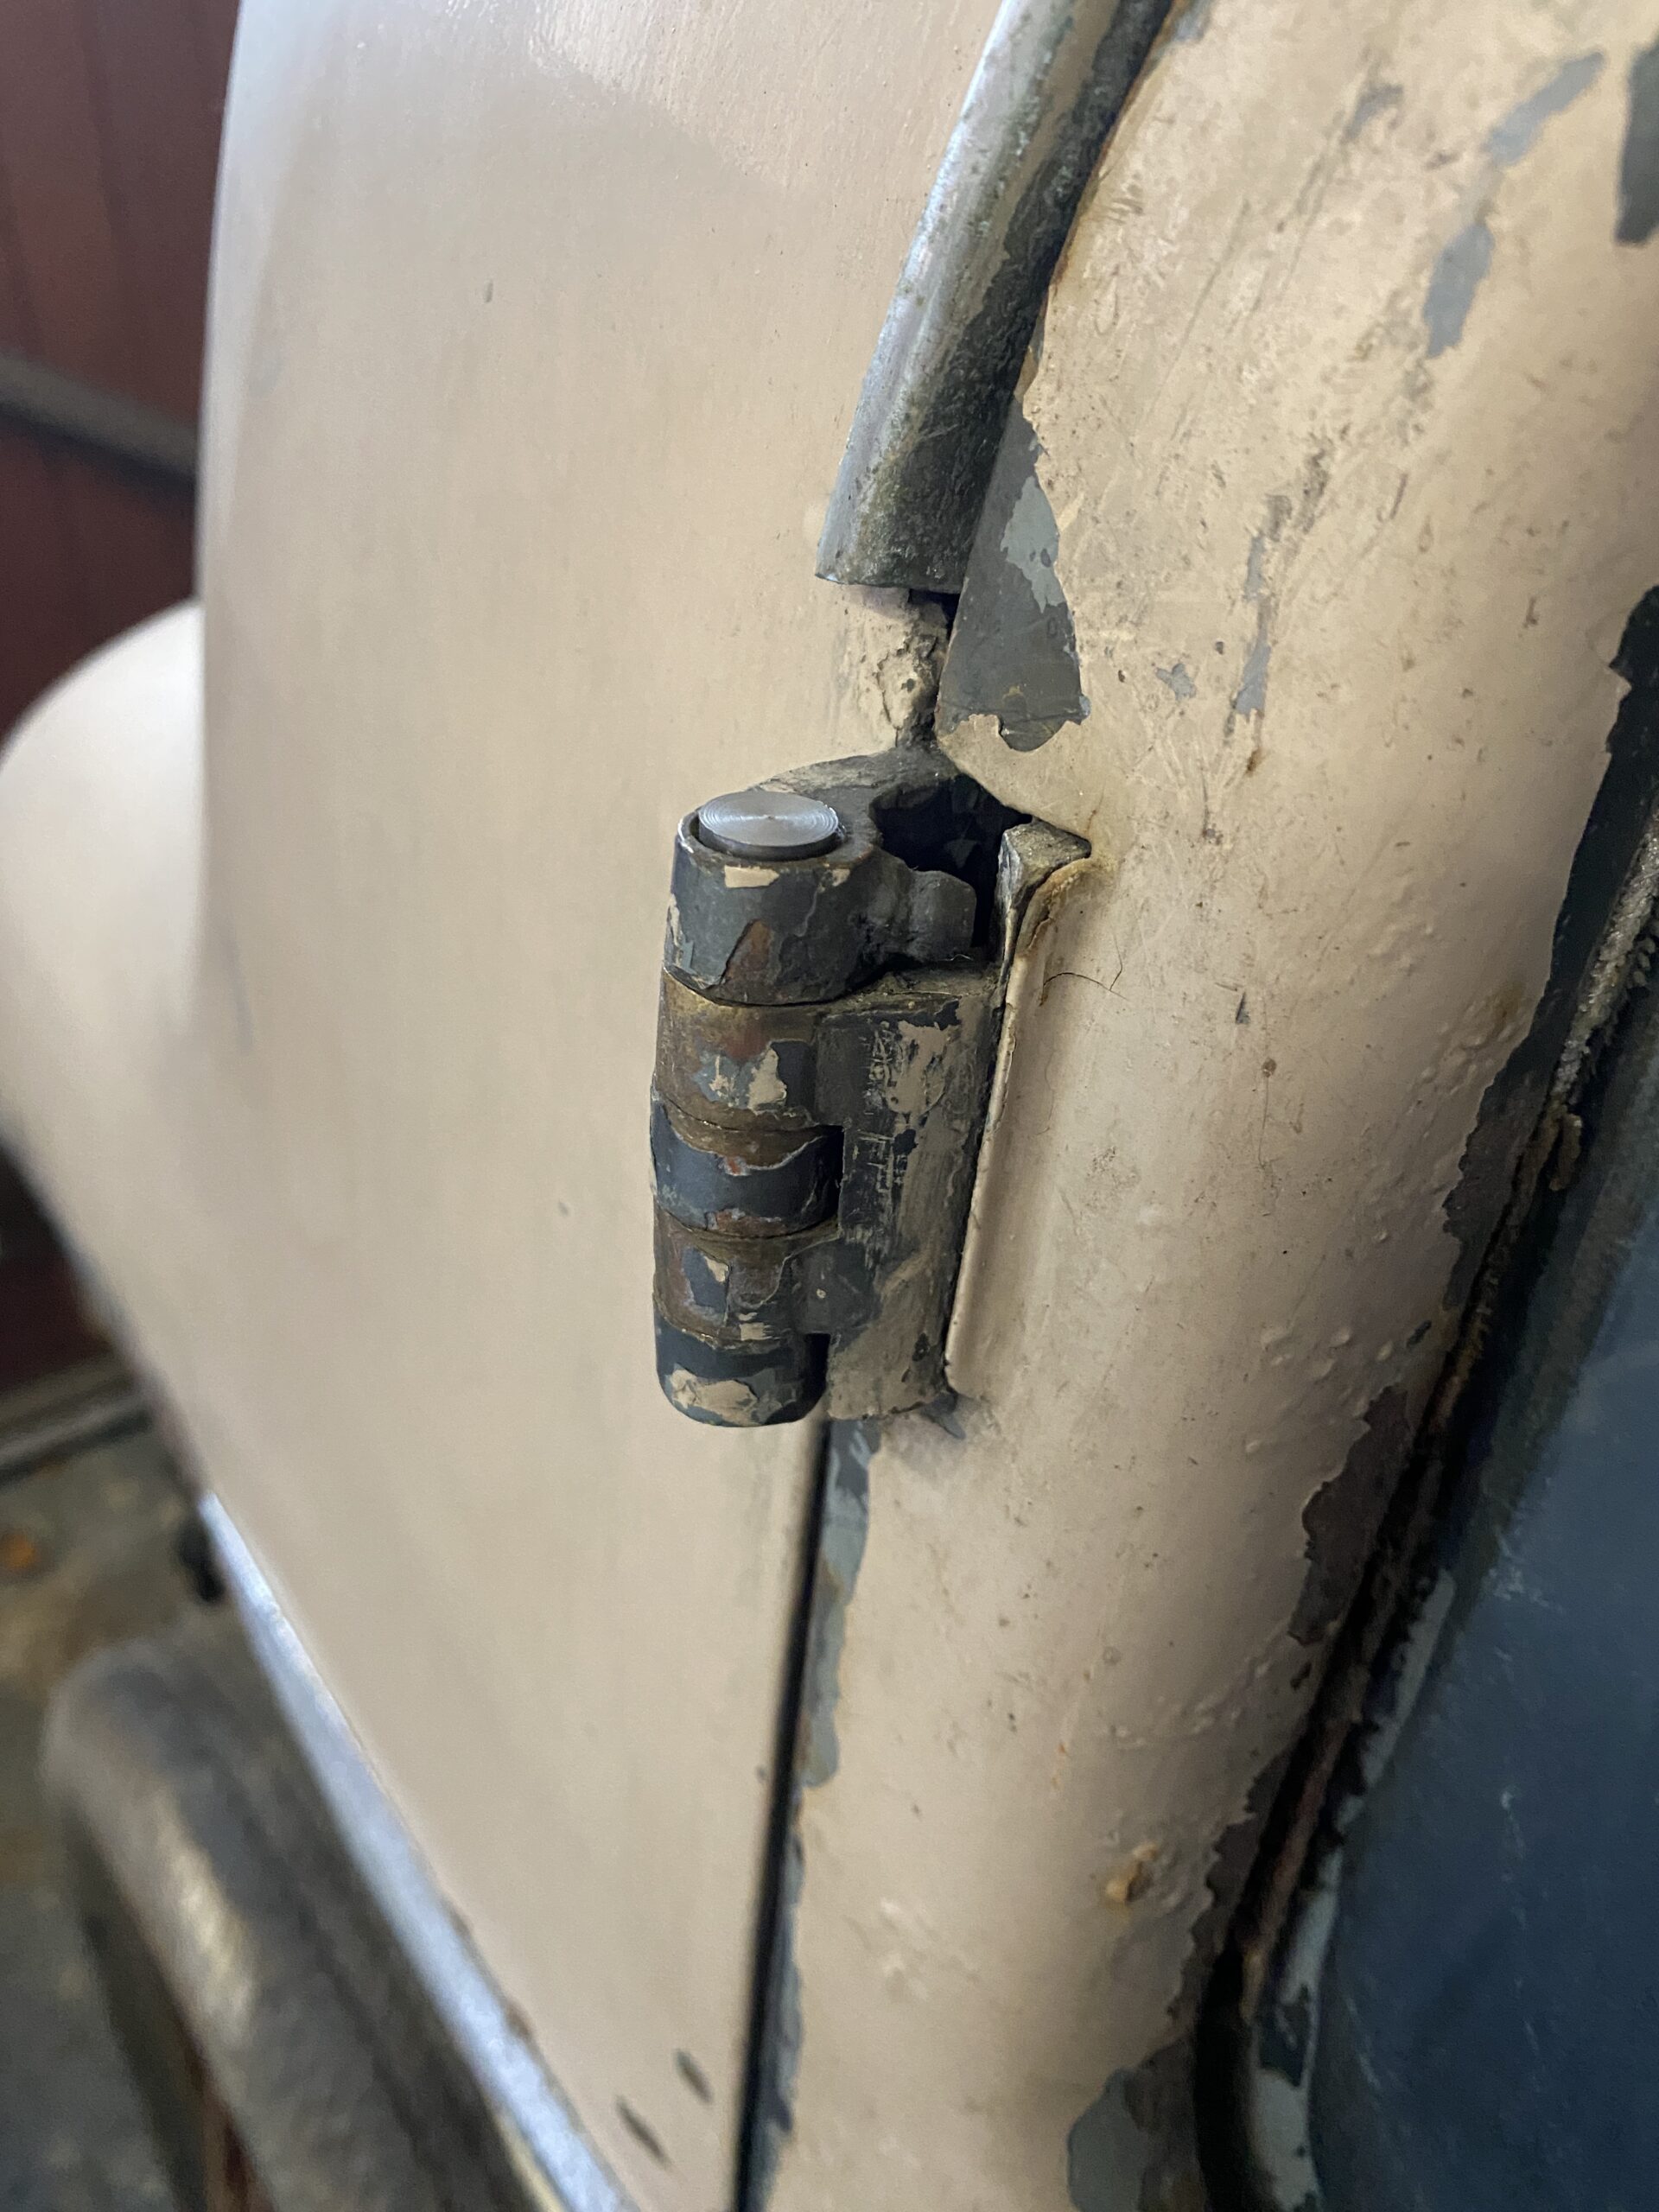
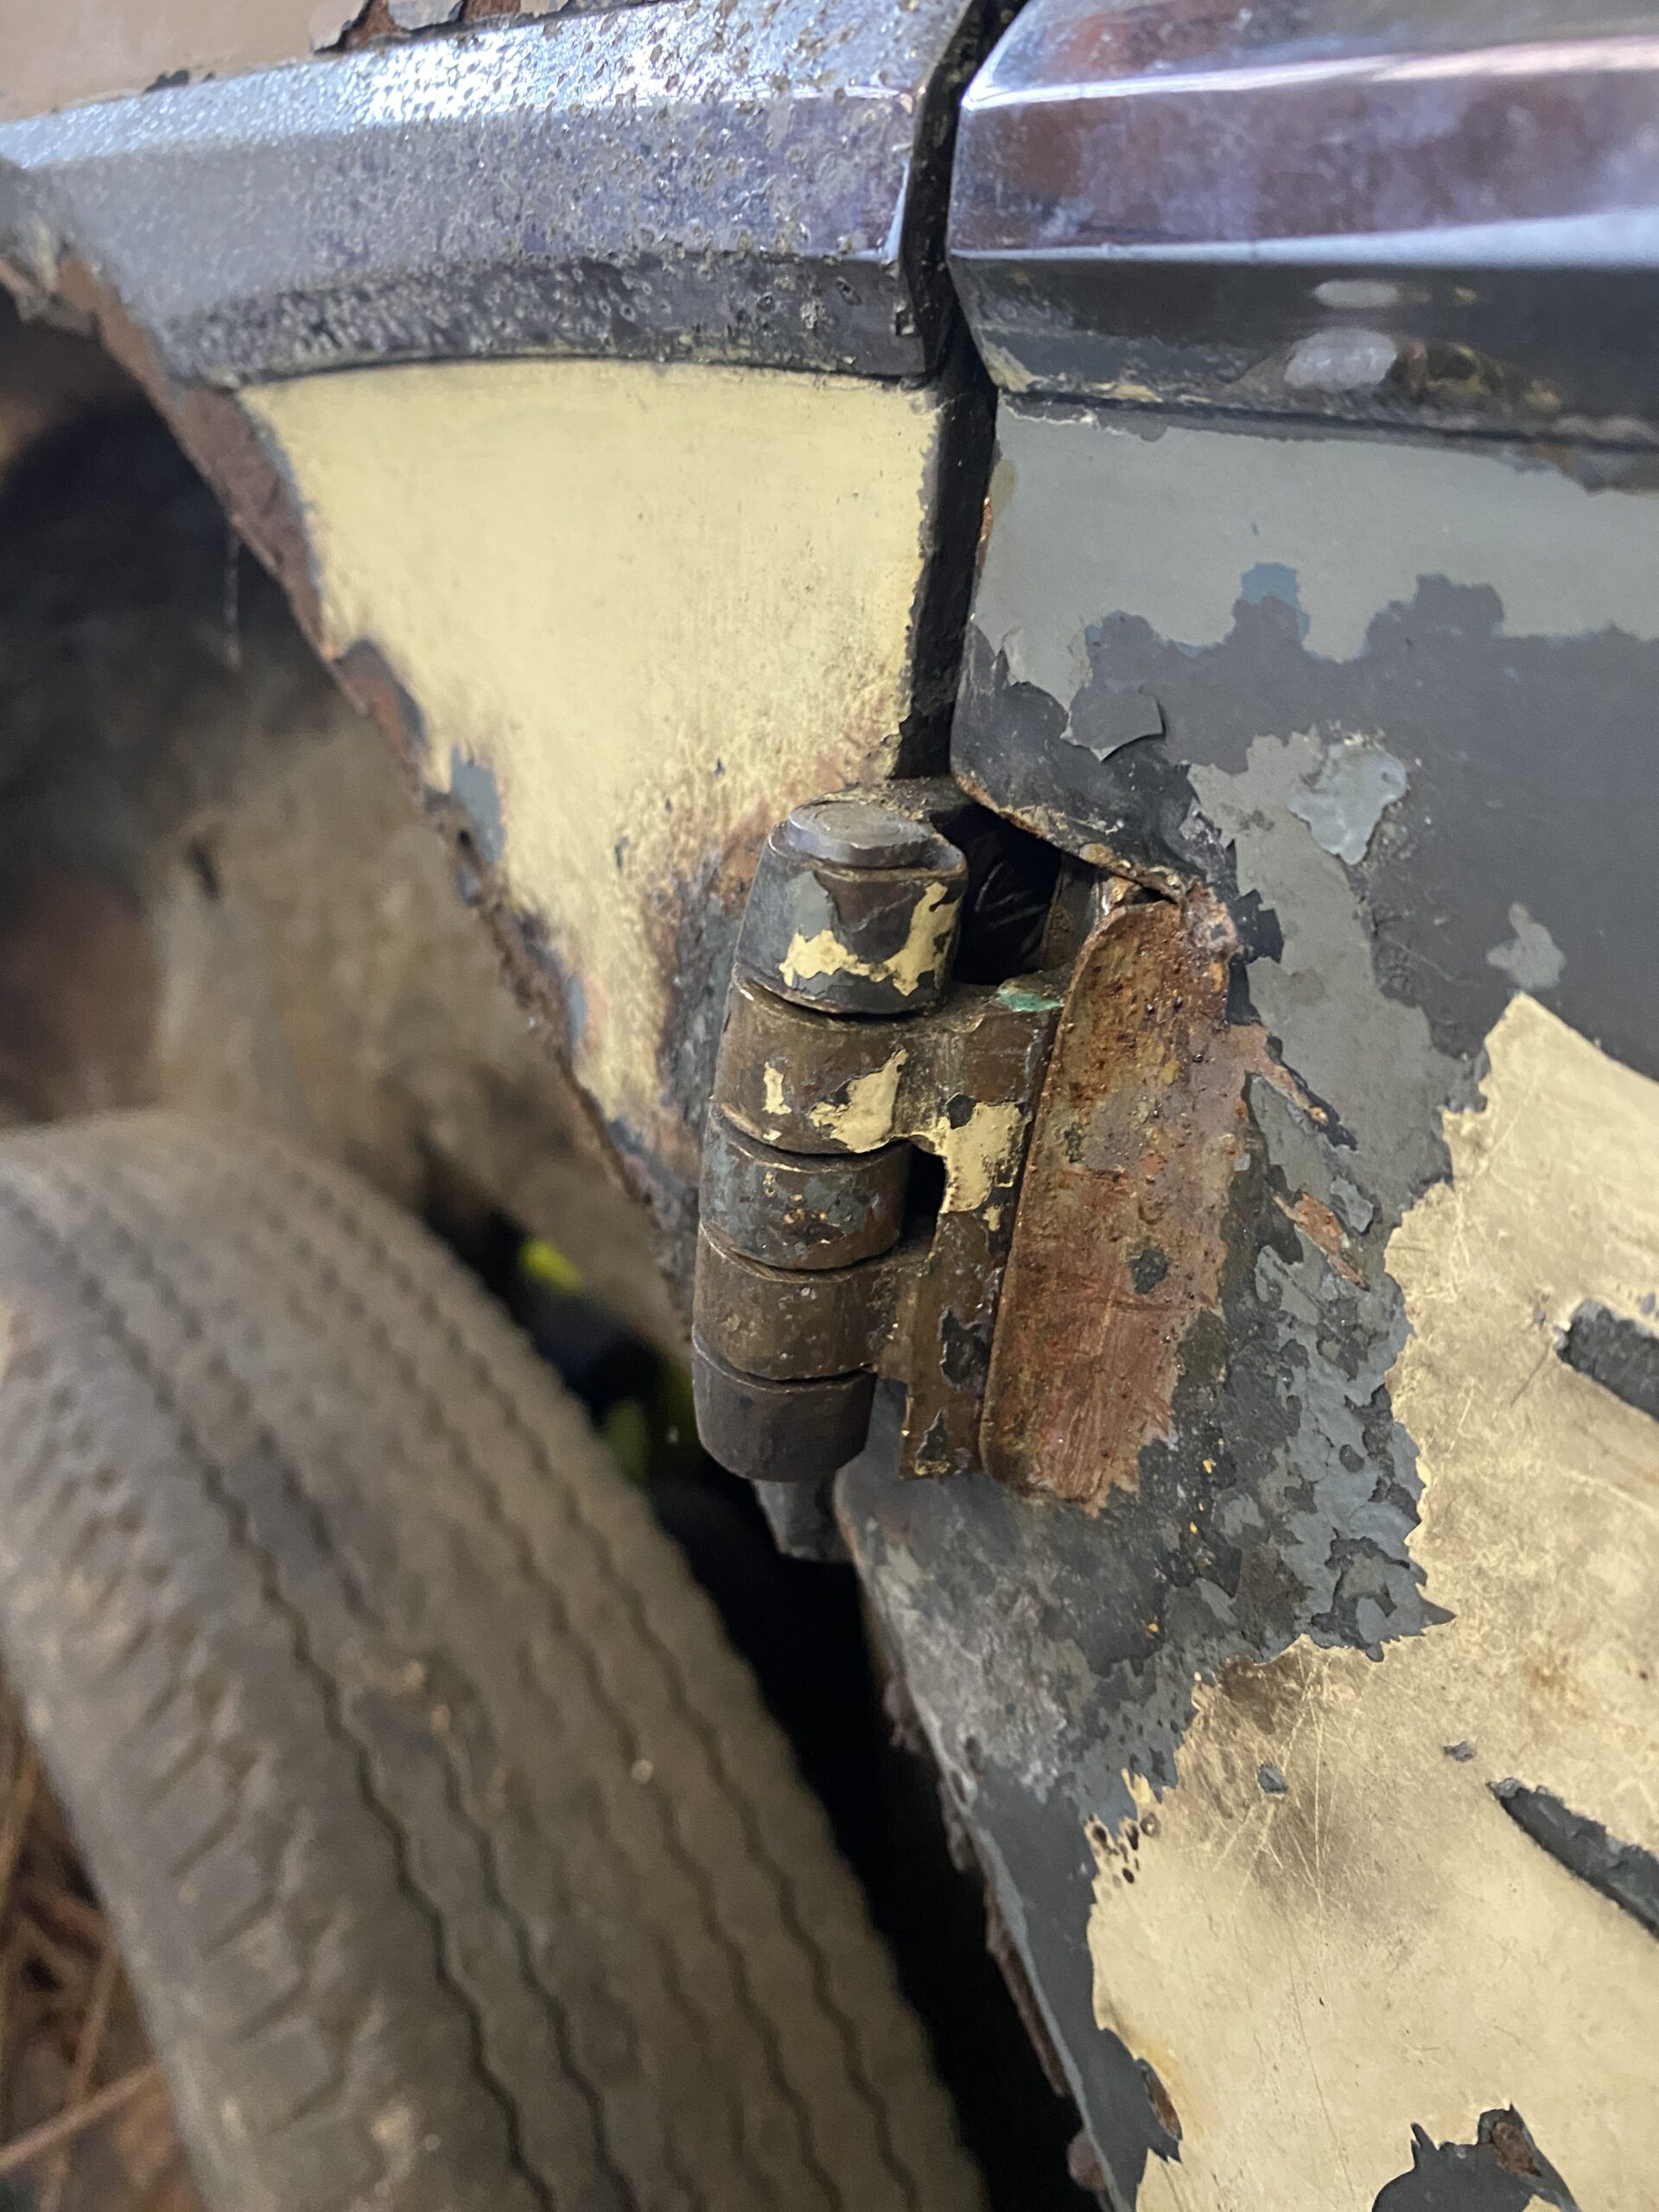
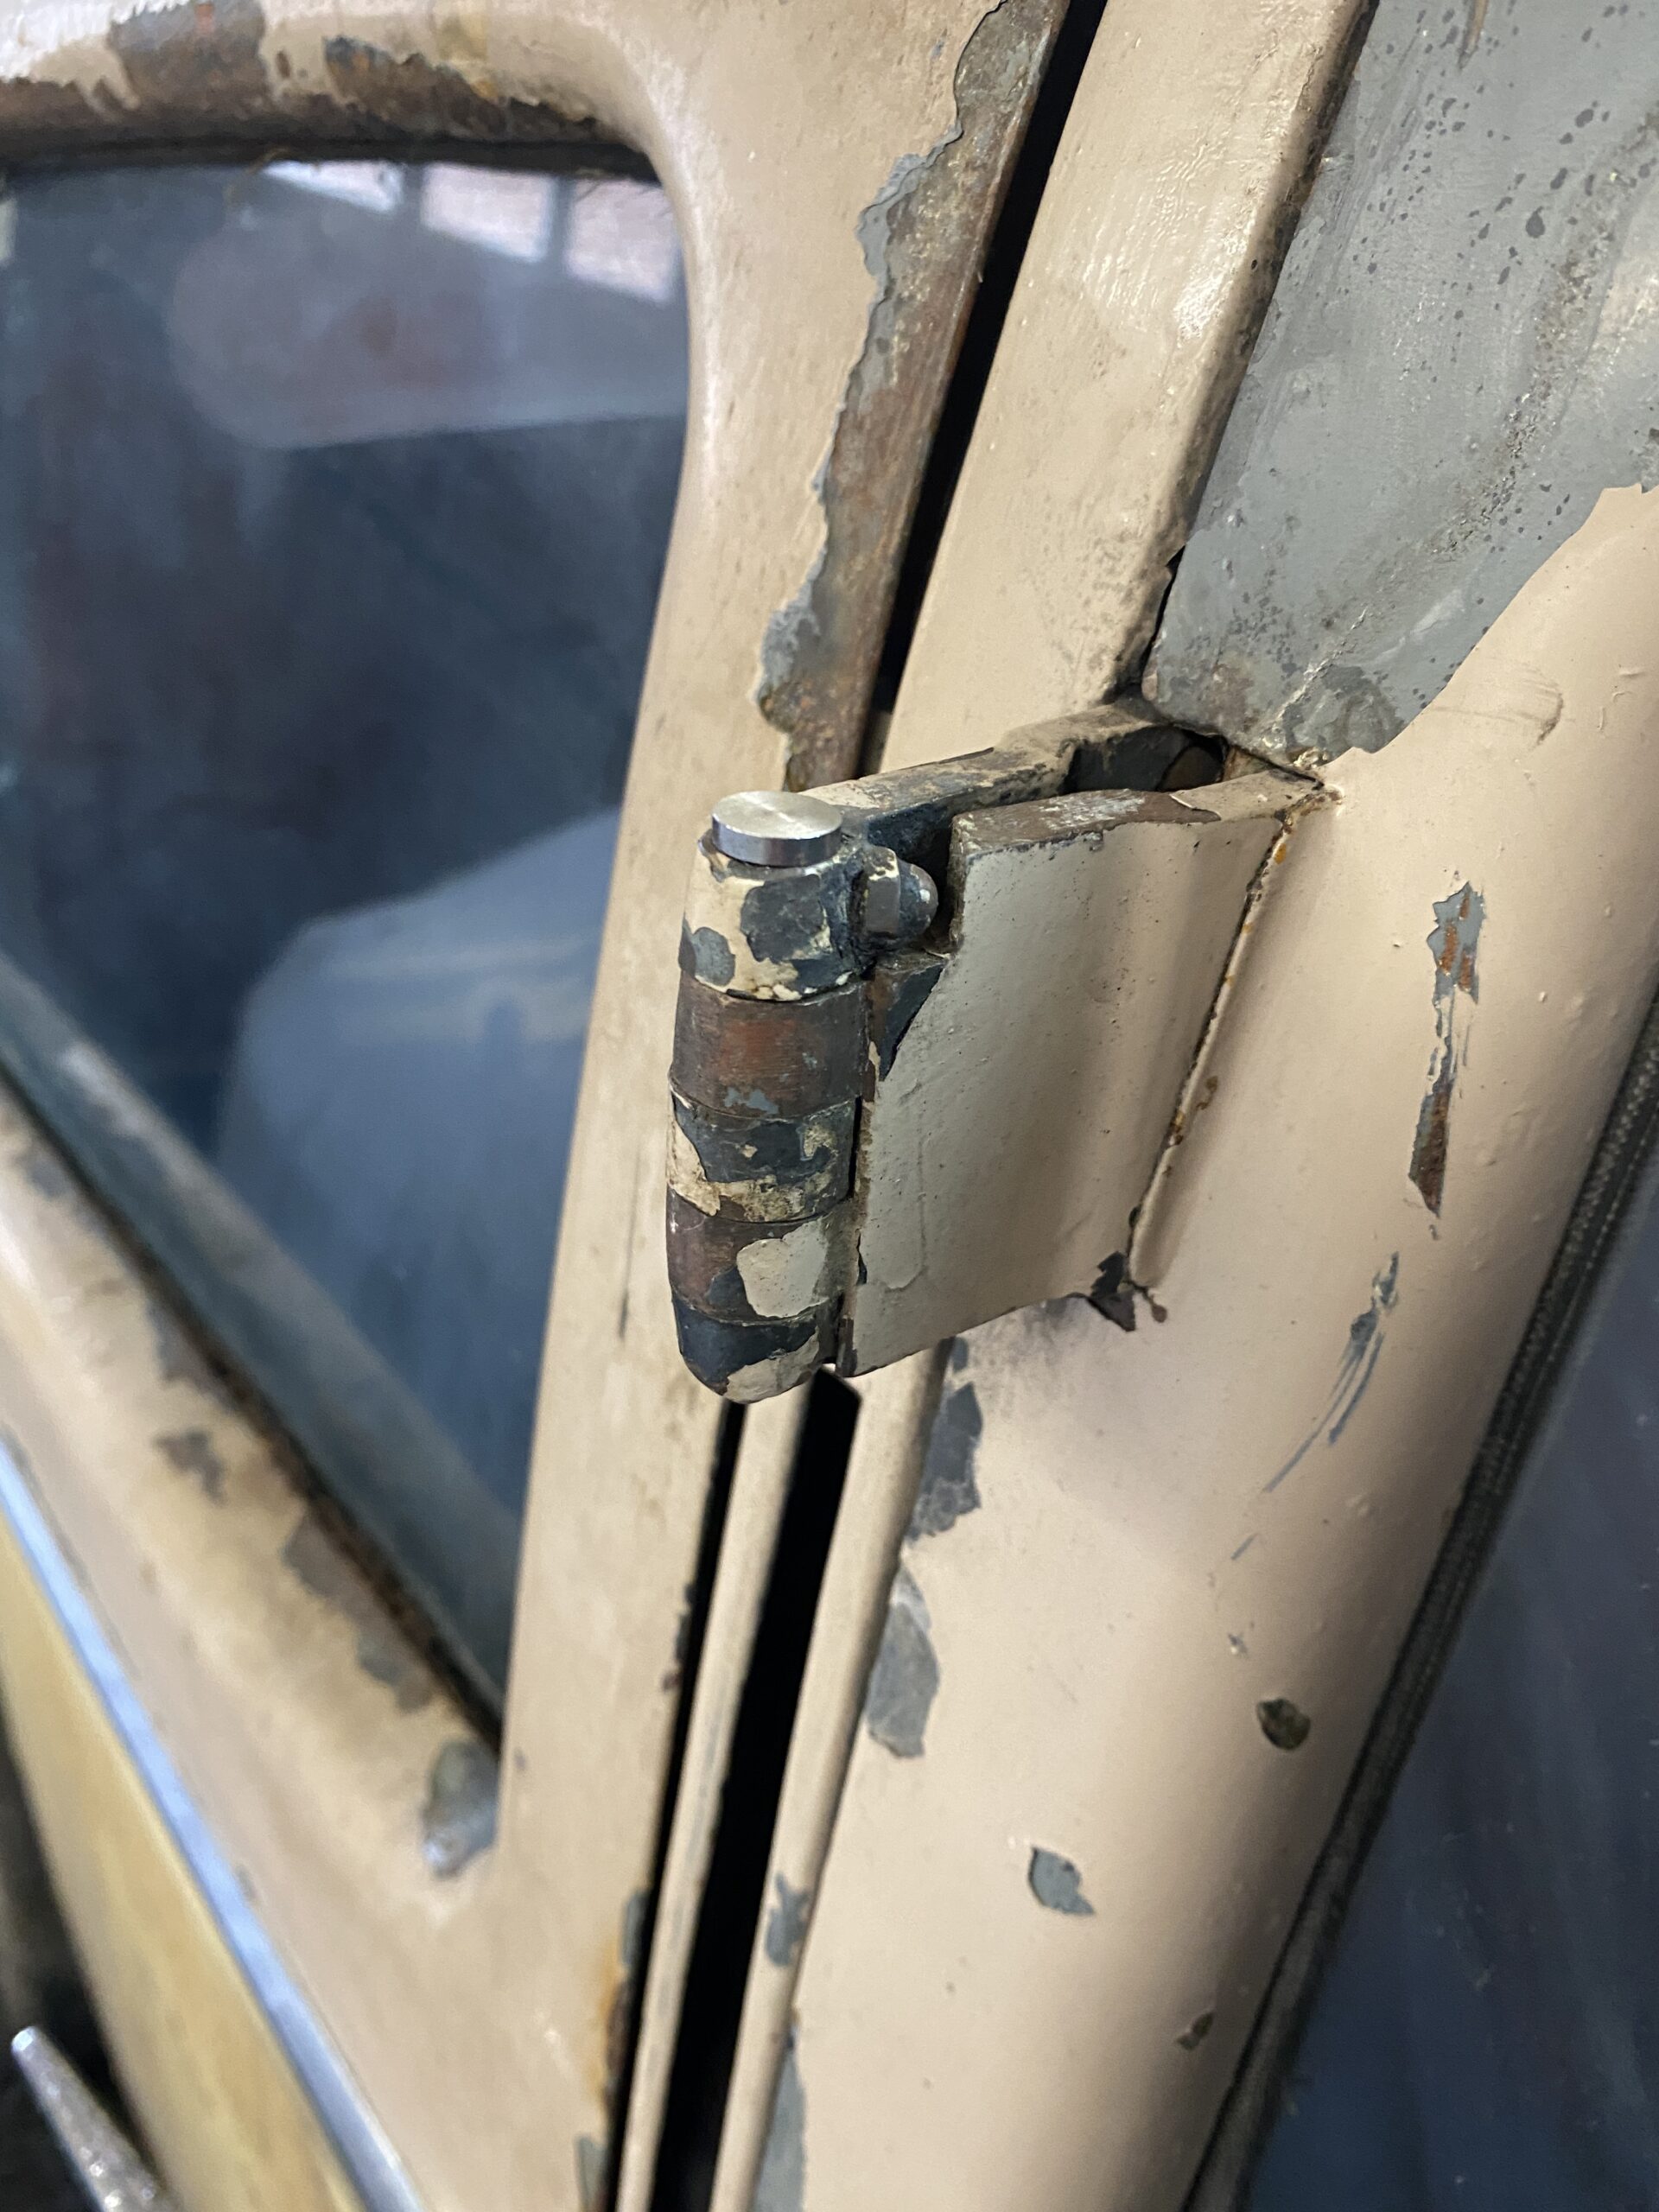
Doors now have hinges

Doors now have hinges

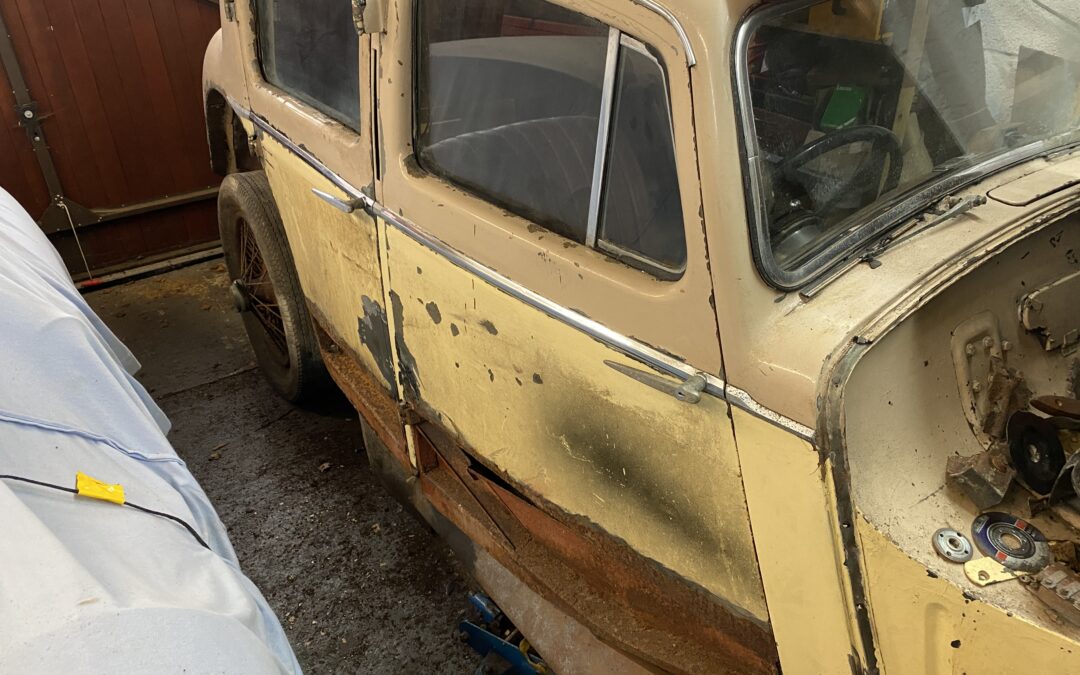
Well this post has been a long time coming, mostly due to my career meaning I was working abroad a lot and partly because there was a lot of head scratching and discover needed to move forwards. Fundamentally I am still aiming to install metal rocker panels to replace the period fix of using oak planks which I have now identified was considered a common fix at the time. The problem I am trying to resolve is exactly where those rocker panels need to be mounted. Too high and the doors wont close, too low and there will be a ton of wind noise and potentially water ingress, neither of which are desirable. I also wanted to be sure that the panel fit was good which meant checking that the B Post (the vertical pillar between the front and rear doors) was in the right place and could be used as a reference for when I weld the B Post to the rocker panel.

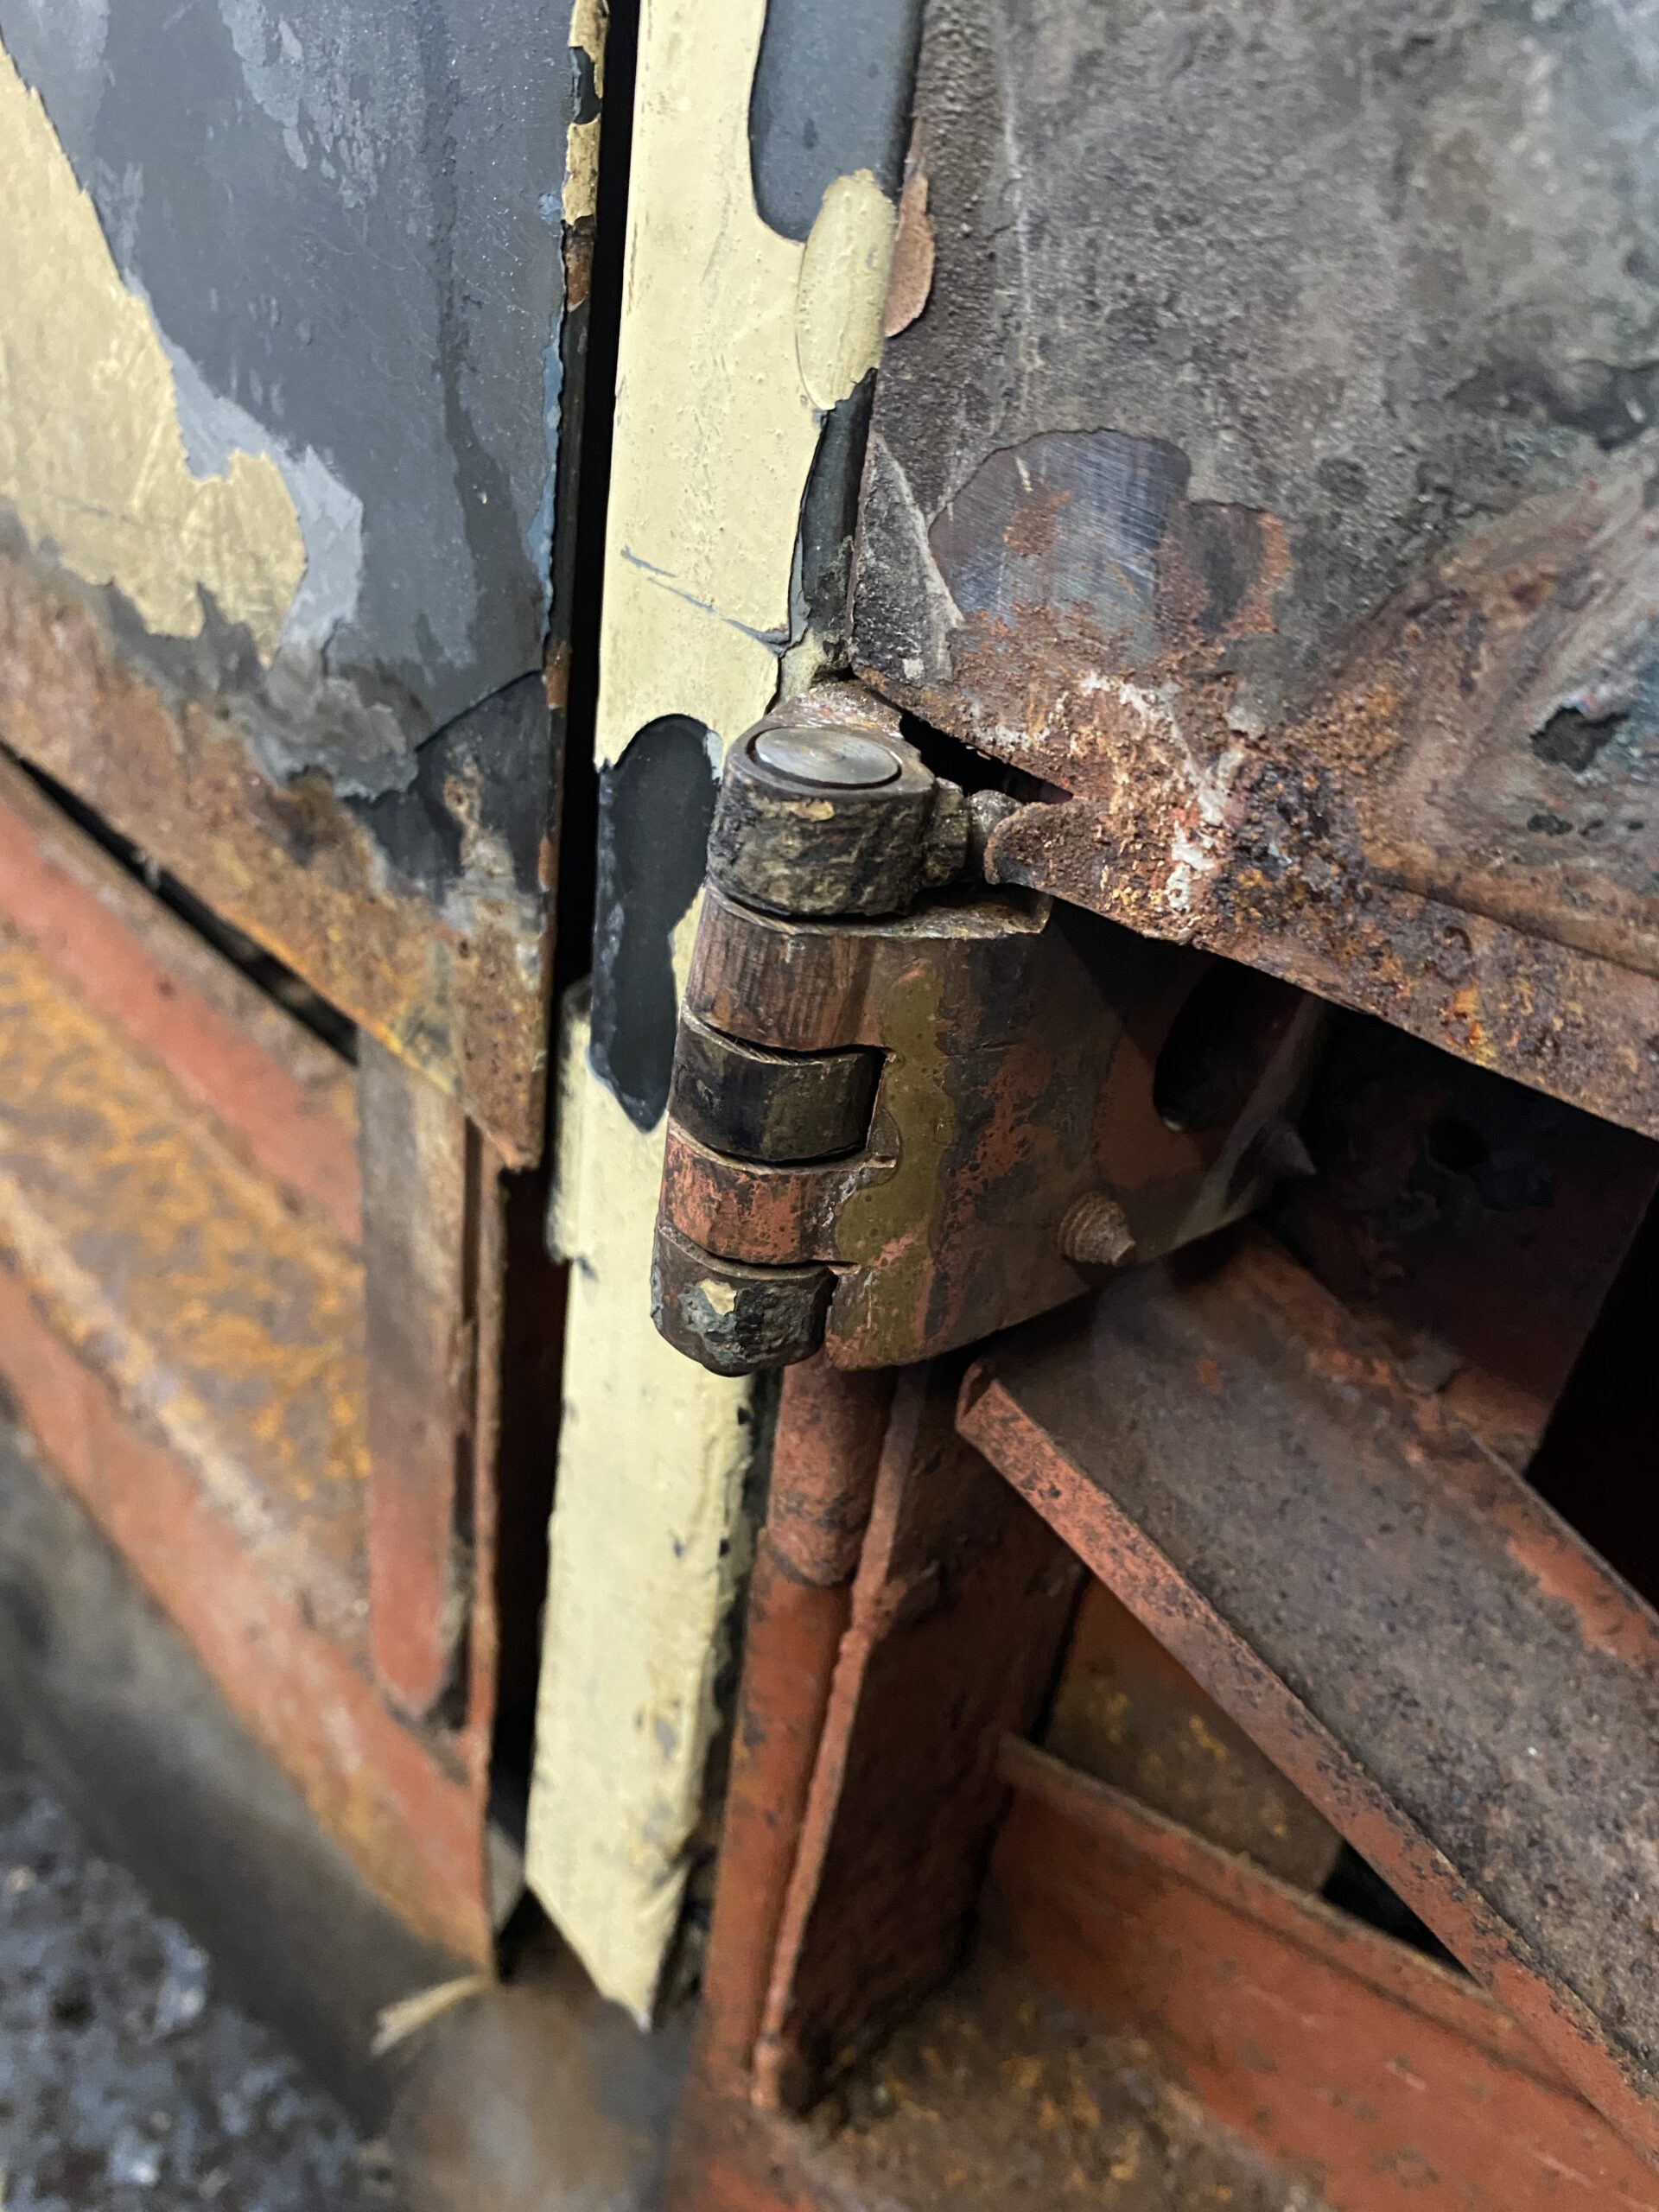
Previously I had used 6mm bolts as a temporary hinge pin. Whilst that was good enough to hang the doors it did mean that the hinges had a touch of free play so it was time to find some new hinge pins. Jump forward a month or two and it seems you CANT buy correct hinge pins so I would have to make some. Jump forward a couple of weeks and with all the dimensions supplied by fellow enthusiasts, I fired up the trusty lathe. The primary challenge with the machining being that the hing pins have a very slight taper and a oil groove that spirals down its length. The oil groove I have yet to find a solution for, the very small taper just took some time to work out. Having made two new hinge pins to the required dimensions, I then discovered that the brass hinges have some wear so none of them are the same dimensions - which meant each new hinge pin had to be made to fit a specific hinge. I also had to buy some replacement machine screws as I drilled out the rusty ones. These are 1/4" BSF countersunk screws just in case you were interested. 

Jump forward a few more weeks and I have 4 hinge pins fitted to the 4 hinges. The Drivers side front and rear doors are back in place and I am rather pleased to say that the doors click shut with little effort. The hinges are adjustable so in the photo below the machine screws are only loosley fitted.

Below are a series of progress pictures which I think are fairly self explanatory.

It was when I was taking the photo of the drivers door lower hinge (bottom photo) that i noticed the gap between the leading edge of the rear door and the B Post. The panel gaps with these coach built cars is MUCH smaller than modern cars (maybe 2-3mm) so the current gap needs to be closed up. Taking a look at the Drivers door the panel gap at the front of the door is nearer 1mm so I *think* the B post needs to be moved backwards a couple of millimeters. Good to know now before I weld the B post to the rocker panel.

It really is rather satisfying to have doors that just click shut with little effort, quite classy really. Well done Jaguar.